Author: admin

  • How to Read and Understand Academic Journal Articles

    How to Read and Understand Academic Journal Articles

    Academic journal articles are an important part of university learning, scientific research, and academic writing. They provide evidence, explain new discoveries, evaluate existing ideas, and help students understand what researchers already know about a subject. However, reading them can feel challenging, especially when they contain technical terminology, statistical results, complex arguments, and unfamiliar research methods.

    Learning how to read academic journal articles is a skill that becomes easier with practice. Instead of reading every paper from beginning to end at the same speed, you can use a structured approach to identify the main argument, understand the research methods, evaluate the evidence, and record the information that matters to your studies.

    This guide explains how academic journal articles are organized, how to read them efficiently, how to understand difficult sections, and how to decide whether a study is reliable and relevant to your research.

    What Is an Academic Journal Article?

    An academic journal article is a scholarly publication that communicates research findings, theoretical arguments, critical analysis, or reviews of existing knowledge. These articles are written by researchers, academics, and subject specialists and published in journals focused on particular disciplines.

    Depending on the subject and publication, an academic article may report the results of an experiment, analyze survey data, examine historical documents, explore interviews, or synthesize findings from previous studies.

    Common types of academic journal articles include:

    • Original research articles: Present new research questions, methods, evidence, and findings.
    • Literature reviews: Summarize and evaluate existing research on a topic.
    • Systematic reviews: Use predefined procedures to identify, select, and synthesize relevant studies.
    • Theoretical articles: Develop, compare, or critique concepts and theoretical frameworks.
    • Case studies: Examine a particular person, organization, event, or situation in depth.
    • Methodological articles: Introduce, evaluate, or refine research methods and techniques.

    Understanding the article type helps you determine what to look for. An experimental study, for example, may contain detailed methods and statistical results, while a theoretical paper may focus on concepts, arguments, and supporting literature.

    Why Is It Important to Read Academic Journal Articles?

    Reading scholarly articles helps students move beyond basic textbook explanations and engage directly with research evidence. It also develops skills that are useful for assignments, dissertations, presentations, and future professional work.

    1. Build Deeper Subject Knowledge

    Journal articles often discuss specialized questions that textbooks cover only briefly. Reading them allows you to explore a topic in greater detail and understand current debates within a field.

    2. Develop Critical Thinking Skills

    Academic reading encourages you to examine evidence, question assumptions, compare explanations, and recognize limitations rather than accepting every claim at face value.

    3. Improve Academic Writing

    Studying well-written research papers can help you understand how scholars structure arguments, support claims with evidence, explain methods, and acknowledge alternative interpretations.

    4. Find Credible Evidence for Assignments

    Scholarly articles can provide relevant findings and references for essays, literature reviews, and research projects. You should still evaluate each source before using it as evidence.

    5. Identify Research Gaps

    Comparing multiple studies can reveal unanswered questions, conflicting findings, and areas that need further investigation. These insights can help you develop a stronger research question.

    Step 1: Identify Your Purpose Before Reading

    Before opening an article, decide why you need to read it. Your purpose determines which sections deserve the most attention and how deeply you need to examine the evidence.

    For example, you might need to:

    • Find evidence for an academic essay.
    • Understand a theory or unfamiliar concept.
    • Prepare for a classroom discussion.
    • Compare the findings of several studies.
    • Evaluate the quality of a research method.
    • Prepare a literature review or research proposal.

    If you only need to determine whether a paper is relevant to your assignment, a brief initial review may be enough. If you plan to use its findings as important evidence, you will need to examine the methods, results, and limitations more carefully.

    Write down your research question before reading. This gives you a clear standard for deciding which information is useful and which details are less relevant.

    Step 2: Read the Title, Abstract, and Keywords

    Start by reviewing the title, abstract, and keywords rather than immediately reading the full paper.

    Understand the Title

    The title identifies the main subject and may indicate the population, setting, variables, or research method.

    For example, a title about the relationship between sleep duration and examination performance among university students tells you more about the study’s scope than a general title about student health.

    Look for terms that connect directly to your research question.

    Read the Abstract

    The abstract is a short overview of the article. It commonly summarizes the research problem, objectives, methods, main findings, and conclusions.

    While reading it, ask:

    • What question were the researchers trying to answer?
    • Why was the study conducted?
    • What methods or data did they use?
    • What were the main findings?
    • Does the article relate to my assignment?

    If the abstract suggests that the paper is irrelevant, you may not need to read further. If it appears useful, continue to the introduction and conclusion to confirm its relevance.

    Important: An abstract is a screening tool, not a substitute for reading the full article when you need to evaluate or cite its findings.

    Check the Keywords

    Keywords identify important concepts associated with the article. They can help you understand its subject and discover related research.

    Record unfamiliar terms and use them to search for additional articles when necessary.

    Step 3: Preview the Article Before Reading It in Detail

    Academic papers can be lengthy, so previewing helps you understand their structure before investing time in close reading.

    Scan the headings and subheadings, examine tables and figures, and look at the discussion and conclusion. This gives you a preliminary understanding of the paper’s organization and central message.

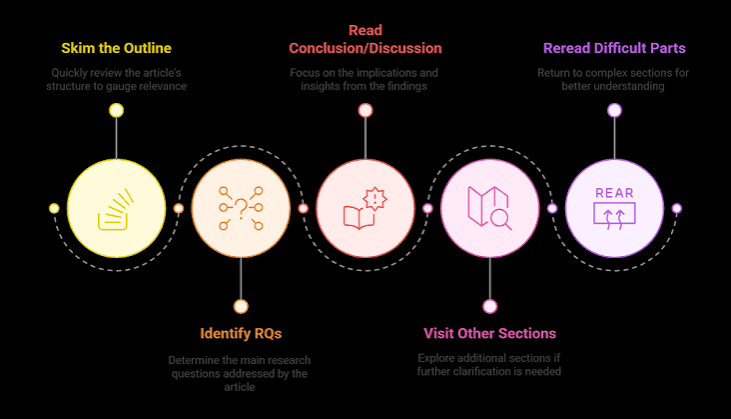
    For many empirical research articles, a useful initial reading order is:

    1. Title and abstract
    2. Introduction
    3. Discussion and conclusion
    4. Results and figures
    5. Methods
    6. Full article review and references

    This is a flexible strategy, not a universal rule. If your assignment focuses on research design, read the methods earlier. If you are analyzing a theoretical argument, concentrate on the central claims and supporting reasoning.

    After previewing the paper, try to summarize its topic and main finding in one or two sentences. If you cannot do this, identify which section needs closer attention.

    Step 4: Understand the Main Sections of an Academic Journal Article

    Most empirical research articles contain several recognizable sections. Learning the purpose of each section makes complex papers easier to navigate.

    Introduction: Why Was the Study Conducted?

    The introduction explains the research problem and why it matters. It may discuss earlier studies, identify an unanswered question, present a hypothesis, or state the article’s objectives.

    Look for the gap between what researchers already know and what the current study attempts to investigate.

    Ask yourself:

    • What problem are the authors addressing?
    • What is already known about the subject?
    • What remains uncertain?
    • What is the main research question or hypothesis?
    • Why might the study be important?

    Do not assume that every statement in the introduction is a finding from the current study. Some information describes earlier research or provides background context.

    Literature Review: What Do Previous Studies Say?

    A literature review examines relevant research that has already been published. It helps explain how the current article fits into the broader academic discussion.

    Pay attention to recurring findings, disagreements between researchers, important theories, and limitations in earlier studies.

    When reading a literature review, distinguish between what the current authors have discovered and what they are reporting from previous publications.

    Methods: How Was the Research Conducted?

    The methods section explains how researchers collected and analyzed their evidence. Depending on the study, it may describe participants, sampling procedures, equipment, measurements, experiments, interviews, questionnaires, or statistical techniques.

    This section is essential when evaluating whether the findings are trustworthy.

    Consider these questions:

    • Who or what was studied?
    • How were participants, cases, or sources selected?
    • How was the data collected?
    • Were the measurements appropriate?
    • How did the researchers analyze the evidence?
    • Were ethical requirements addressed where relevant?

    For example, a survey of 40 volunteers may provide useful information about those respondents, but it may not represent the views of an entire country’s student population.

    You do not need to understand every technical detail on your first reading. Identify the overall research design, then investigate unfamiliar methods that are important to your assignment.

    Results: What Did the Researchers Find?

    The results section presents the evidence generated by the study. It may include numerical measurements, statistical tests, charts, tables, interview themes, observations, or other findings.

    Focus first on the results that directly address the research question.

    Ask:

    • What were the main findings?
    • Which results are supported by the presented data?
    • Were any findings unexpected?
    • Do the results answer the original research question?
    • Are there important differences between groups or conditions?

    Be careful not to confuse a result with its interpretation. A study may find an association between two variables, for instance, without establishing that one caused the other.

    Discussion: What Do the Findings Mean?

    The discussion explains how the authors interpret their results. Researchers may compare their findings with earlier studies, suggest possible explanations, describe practical implications, and identify limitations.

    Read this section critically. The authors’ interpretation should be supported by the evidence presented in the results.

    Notice whether the researchers consider alternative explanations and whether they acknowledge findings that do not fit their expectations.

    Conclusion: What Is the Main Takeaway?

    The conclusion summarizes the article’s contribution and explains what readers should take away from the research. It may also identify unanswered questions or suggest directions for future studies.

    After reading it, ask whether the conclusion matches the methods and results. Strong conclusions remain within the limits of the available evidence.

    References: Where Did the Evidence Come From?

    The reference list identifies the sources cited in the article. It is useful for checking claims, locating original research, and discovering other publications on the same topic.

    Look for relevant studies that appear repeatedly across papers. These may help you identify influential theories or important research in the field.

    Step 5: Use Active Reading Techniques

    Active reading means engaging with the paper instead of passively moving your eyes across the text. The aim is to understand, question, and remember the important information.

    Annotate the Article

    If you are reading a digital or printed copy, mark important passages and write brief notes in the margins or a separate document.

    You might label passages as:

    • Main claim: The central argument or finding.
    • Evidence: Data or reasoning that supports a claim.
    • Definition: An important concept or technical term.
    • Question: Something you do not understand.
    • Limitation: A weakness or restriction affecting interpretation.
    • Connection: A link to another study or your assignment.

    Avoid highlighting entire paragraphs. Select only the information that contributes to understanding the research question.

    Summarize Each Section

    After completing a section, pause and write a one- or two-sentence summary in your own words.

    For example:

    “The researchers compared students using two revision strategies. The results showed different average test scores, but the study design and sample need to be considered before drawing broad conclusions.”

    A short summary helps you check your understanding and reduces the need to reread the entire article later.

    Ask Questions While Reading

    Use questions to guide your attention:

    • What claim is being made?
    • What evidence supports it?
    • How was that evidence collected?
    • What assumptions are involved?
    • Are there other possible explanations?
    • How does this relate to my research question?

    These questions turn reading into a process of evaluation rather than simple information collection.

    Step 6: Learn How to Read Academic Research Data

    Many students find numerical results more difficult than the written sections. You do not necessarily need to understand every statistical calculation to identify the main findings, but you should know what the reported measurements mean.

    Understand the Variables

    A variable is a characteristic that can differ between individuals, groups, or observations.

    In a study of sleep and examination performance, sleep duration and exam scores might be measured as variables. Before interpreting the results, check how each variable was defined and measured.

    Read Tables Carefully

    When examining a table, check:

    • The title and purpose of the table.
    • The row and column headings.
    • The units of measurement.
    • The sample size, if reported.
    • Any notes explaining abbreviations or statistical results.

    Do not compare numbers until you understand what they represent and whether they use the same scale.

    Interpret Charts and Graphs

    Look at the axes, labels, legend, and scale. Identify the pattern the chart displays and compare it with the explanation in the article.

    A graph can make a difference appear large or small depending on its scale, so avoid judging the importance of a result from appearance alone.

    Understand Statistical Significance

    In statistical research, a result described as statistically significant generally means that it meets a specified statistical criterion under the assumptions of the analysis.

    It does not automatically mean the effect is large, practically important, or free from bias. Consider the effect size, uncertainty, study design, and relevance to the research question where these details are available.

    Step 7: Evaluate the Quality and Reliability of the Article

    Not every published paper provides equally strong evidence. Before relying on an article, assess the credibility of its publication, the quality of its methods, and the strength of its conclusions.

    Check the Authors and Journal

    Identify the authors and their relevant expertise. Examine the journal’s scope, editorial information, and peer-review practices where available.

    Peer review can help improve scholarly work, but it does not guarantee that every finding is correct. Published research can contain errors, methodological weaknesses, or conclusions that later evidence challenges.

    Examine the Research Design

    Ask whether the methods are appropriate for the research question.

    A well-designed experiment may support stronger causal conclusions than a simple observational study, depending on how the research was conducted. An interview study may be more appropriate for exploring experiences that cannot be adequately captured by numerical measurements.

    Evaluate the study according to its purpose rather than expecting every article to use the same method.

    Consider the Sample and Data

    Check the sample size, participant selection, data collection procedures, and missing information.

    A small sample is not automatically poor research, particularly in an in-depth qualitative study. However, the sample and method must be suitable for the conclusions being made.

    Look for Limitations and Conflicts of Interest

    Authors may discuss limitations such as restricted sample diversity, measurement problems, short study duration, or limited generalizability.

    Also consider whether funding sources or potential conflicts of interest have been disclosed. Such disclosures do not automatically invalidate research, but they may be relevant when assessing the evidence.

    Compare Important Claims With Other Research

    When a claim is central to your assignment, check whether other credible studies report similar findings or identify conflicting evidence.

    One article rarely settles a complex academic question on its own. Comparing research helps you understand how strong and consistent the evidence is.

    Step 8: Understand Difficult Academic Vocabulary

    Academic articles often contain specialized terminology, abbreviations, and complex sentences. These can make a paper seem more difficult than it actually is.

    Use the following strategies to improve comprehension.

    Identify key terms. Note words that appear repeatedly or seem central to the argument.

    Use reliable definitions. Consult a subject textbook, academic glossary, or reputable reference source. Check how the term is used in the article’s specific field.

    Break long sentences into parts. Identify the main subject, the action or claim, and the supporting details.

    Rewrite complex ideas in plain English. Preserve the meaning while removing unnecessary technical wording.

    Use context. Read the surrounding paragraph before deciding what an unfamiliar term means.

    For example, “correlation” refers to a relationship between variables, while “causation” means that one factor produces or contributes to a change in another. Confusing these terms can lead to incorrect interpretations of research findings.

    If a concept remains unclear, look for a textbook explanation or another scholarly article that introduces it more simply.

    Step 9: Take Notes That Will Help With Assignments

    Good research notes should help you remember what an article says, evaluate its usefulness, and cite it accurately later.

    Instead of copying large sections of text, organize your notes around the information you need.

    A practical article summary can include:

    1. Full citation: Authors, year, title, journal, and DOI or URL when available.
    2. Research question: What the study aimed to investigate.
    3. Method: How the researchers collected and analyzed evidence.
    4. Main findings: The most relevant results or arguments.
    5. Strengths and limitations: Factors affecting the quality or interpretation of the research.
    6. Relevance: How the article contributes to your assignment.
    7. Follow-up questions: Issues to investigate through additional reading.

    Keep direct quotations clearly marked and record page numbers when available. When paraphrasing, use your own wording and cite the original source.

    These habits reduce the risk of accidental plagiarism and make it easier to write a literature review later.

    For more guidance, see our article on how to avoid plagiarism in academic writing.

    Step 10: Connect the Article to Other Research

    Academic understanding grows when you compare studies rather than treating each paper as an isolated source.

    As you read multiple articles, look for similarities and differences in their research questions, methods, populations, and findings.

    For example, two studies might examine whether spaced revision improves student performance. One may report improved test scores, while another finds a smaller effect. Differences in sample size, study duration, assessment design, or participant characteristics may help explain the results.

    Create a comparison table to organize the evidence:

    ArticleResearch focusMethodMain findingLimitation
    Study ARevision frequencyStudent surveyFrequent revision was associated with higher reported confidenceSelf-reported data
    Study BRevision strategyControlled experimentOne strategy produced higher scores under the study conditionsLimited participant group
    Study CLong-term retentionFollow-up assessmentRetention differed across assessment periodsShort follow-up period

    This table is an illustrative example, not a summary of actual published studies. When building your own table, enter information taken directly from the articles you have read.

    Comparing evidence in this way can help you identify research gaps, evaluate competing explanations, and organize a literature review around themes instead of writing a separate summary of every source.

    Step 11: Avoid Common Academic Reading Mistakes

    Even motivated students can struggle if they use an inefficient reading strategy.

    Reading Every Article From Beginning to End Immediately

    Reading every paper line by line can consume too much time when many sources are available. Preview articles first and reserve detailed reading for sources that are relevant to your question.

    Relying Only on the Abstract

    An abstract can omit important limitations and methodological details. Read the full article before making a detailed evaluation or relying on its findings for a major claim.

    Accepting the Authors’ Conclusions Without Checking the Evidence

    The discussion reflects the authors’ interpretation, but you should compare it with the results and methods. Ask whether the conclusions are justified by the data.

    Highlighting Without Summarizing

    Highlighting can help you locate information, but it does not prove that you understand it. Summarize key ideas in your own words and explain why they matter.

    Ignoring Unfamiliar Terms

    Repeatedly skipping important technical terms can lead to misunderstandings. Look up concepts that are essential to the research question or interpretation.

    Taking Notes Without Recording Citations

    Missing citation information can make it difficult to locate a source again. Record bibliographic details as soon as you decide an article is useful.

    Treating One Study as Definitive Proof

    Research findings should be interpreted in the context of study design, limitations, and the broader body of evidence. Look for corroborating research when the claim is important.

    Step 12: Use a Practical Reading Plan for Each Article

    A consistent routine can make academic reading more manageable. The following is an example of a 30-minute first-pass review for a moderately accessible article. Complex papers may require more time.

    <text weight=”medium”>30-minute academic article reading plan</text>

    TimeTaskGoal
    0–3 minutesRead the title, abstract, and keywordsDecide whether the article is relevant
    3–7 minutesPreview headings, figures, and conclusionIdentify the structure and main message
    7–13 minutesRead the introductionUnderstand the question and background
    13–20 minutesExamine results and relevant methodsUnderstand the evidence and how it was produced
    20–25 minutesRead the discussion and limitationsEvaluate the interpretation
    25–30 minutesWrite a short summary and record the citationCapture the main takeaway and next steps

    This plan is intended as a starting point, not a strict rule. If a paper is highly technical or central to your research, slow down and spend more time on the sections that matter most.

    The goal is not to finish every article quickly. It is to understand the evidence efficiently and accurately.

    A Simple Checklist for Reading Academic Journal Articles

    Before using an article in an assignment, check that you can answer the following questions:

    • What is the main research question or argument?
    • Why was the study conducted?
    • What methods or sources did the authors use?
    • What are the most important findings?
    • Does the evidence support the authors’ conclusions?
    • What limitations affect the findings?
    • How does the article relate to my research question?
    • Do I have the full citation details?
    • Do I understand the ideas well enough to summarize them in my own words?
    • Do I need additional sources to verify or compare important claims?

    If you cannot answer several of these questions, return to the relevant sections before relying on the article.

    Frequently Asked Questions

    What is the best way to read an academic journal article?

    Start with the title, abstract, and keywords to assess relevance. Preview the introduction, discussion, conclusion, and figures before reading the methods and results carefully. Take notes, question the evidence, and summarize the main findings in your own words.

    Should I read an academic article from beginning to end?

    Not necessarily on your first pass. Previewing the article helps you determine which sections are most relevant. However, read the necessary sections in detail before evaluating the study or using its findings as important evidence.

    How can I understand academic articles more easily?

    Build familiarity with common research structures, look up essential technical terms, break complex sentences into smaller parts, and write brief summaries after each section. Comparing an unfamiliar paper with an introductory textbook or a clearer review article can also help.

    How do I know if an academic journal article is reliable?

    Evaluate the authors, journal, research methods, sample, data, limitations, and supporting references. Check for relevant disclosures and compare important claims with other credible research. Peer review is useful, but it does not guarantee that every finding is correct.

    What should I write in my notes when reading a research paper?

    Record the full citation, research question, method, main findings, limitations, and relevance to your assignment. Clearly mark direct quotations and distinguish the authors’ ideas from your own interpretations.

    How many academic articles should I read for an assignment?

    There is no single number that fits every assignment. The required amount depends on the subject, academic level, word count, and instructions. Focus on the quality, relevance, and coverage of your sources rather than choosing an arbitrary number.

    What is the difference between a research article and a review article?

    An original research article usually reports a study’s methods and findings. A review article synthesizes and evaluates existing research on a topic. A systematic review follows explicit procedures for identifying and selecting relevant studies, while other reviews may use different approaches.

    How can I use academic journal articles without plagiarizing?

    Understand the source before writing, express ideas genuinely in your own words, and cite the original publication. Use quotation marks for direct quotations and record page numbers when available. Follow your institution’s citation and academic integrity rules.

    Conclusion

    Learning how to read academic journal articles is an essential skill for students who want to research effectively, write stronger assignments, and develop independent critical thinking. The process becomes easier when you read with a purpose, preview the article, understand its main sections, evaluate the evidence, and record useful notes.

    Remember that reading a research paper is not simply about extracting its conclusion. You also need to understand how the researchers reached that conclusion, what limitations affect the findings, and how the study fits into the wider academic discussion.

    With regular practice, you can become more confident at interpreting technical language, recognizing strong evidence, and comparing different perspectives. These skills will help you make better use of scholarly sources throughout your academic journey.

  • Qualitative vs Quantitative Research: Key Differences

    Qualitative vs Quantitative Research: Key Differences

    Choosing the right research method is one of the most important decisions students make when planning an academic project. Some research questions require numerical data and statistical analysis, while others need detailed explanations of people’s experiences, opinions, or behavior. Understanding the difference between qualitative and quantitative research helps you select an approach that fits your research question and produces meaningful results.

    The debate around qualitative vs quantitative research is not about deciding which method is universally better. Both approaches are valuable, but they serve different purposes. Qualitative research explores meanings and experiences, while quantitative research measures variables and examines numerical patterns. In some projects, researchers combine both approaches to develop a more complete understanding of a topic.

    In this guide, you will learn what qualitative and quantitative research mean, how their methods differ, when to use each approach, and how to choose the right method for your academic assignment.

    What Is Qualitative Research?

    Qualitative research is an approach used to understand experiences, perspectives, behaviors, and social processes in depth. It focuses primarily on non-numerical information, such as interview transcripts, written responses, observations, documents, and descriptions of real-world situations.

    Rather than asking only how many people experience something, qualitative researchers often investigate why people think, feel, or behave in particular ways.

    For example, a researcher studying online education might interview university students to understand what makes virtual classes engaging or frustrating. Their responses could reveal issues involving internet access, teaching styles, motivation, or communication with instructors.

    Common Qualitative Research Methods

    Interviews: Researchers ask participants open-ended questions to explore their experiences, opinions, or interpretations.

    Focus groups: A small group discusses a topic while a researcher examines shared views, disagreements, and interactions.

    Observations: Researchers observe behavior or activities in a particular setting, sometimes participating in the environment being studied.

    Case studies: Researchers examine a person, organization, event, or situation in detail to understand its context and complexity.

    Document analysis: Researchers analyze written materials, reports, diaries, policies, or other documents to identify meanings and recurring themes.

    These methods allow researchers to investigate complex questions that may not be adequately explained through numerical measurements alone.

    Characteristics of Qualitative Research

    Qualitative research commonly has the following characteristics:

    • It explores meanings, experiences, and perspectives.
    • It often uses open-ended questions.
    • It produces detailed descriptions rather than primarily numerical results.
    • It considers the context in which behavior or experiences occur.
    • It commonly analyzes data by identifying themes, patterns, and interpretations.
    • It may use flexible research questions that develop as understanding grows.

    Qualitative studies can provide rich insights, but their findings should be interpreted in relation to the participants, setting, and research design. A small group of interviewees, for example, cannot automatically represent the views of an entire population.

    What Is Quantitative Research?

    Quantitative research uses numerical data to measure variables, describe patterns, compare groups, and investigate relationships. Researchers collect information in a structured format and analyze it using mathematical or statistical techniques.

    This approach is useful when a research question involves quantities, frequencies, differences, or measurable outcomes.

    For example, a researcher investigating student attendance might collect attendance records from several classes and examine whether attendance rates are associated with examination results. The analysis could reveal a relationship between the variables, although it would not automatically establish that attendance caused the differences in results.

    Common Quantitative Research Methods

    Surveys with structured questions: Researchers collect standardized responses, often using multiple-choice questions, rating scales, or other predefined answer formats.

    Experiments: Researchers manipulate one or more variables under controlled conditions to examine their effects, where the design permits such conclusions.

    Structured observations: Researchers record predefined behaviors or events using consistent categories and measurement rules.

    Existing numerical datasets: Researchers analyze previously collected statistics, administrative records, or publicly available datasets.

    Correlational studies: Researchers examine whether variables change together without necessarily manipulating them.

    The appropriate method depends on the research question, available data, ethical requirements, and the conclusions the study is intended to support.

    Characteristics of Quantitative Research

    Quantitative research often includes these features:

    • It focuses on measurable variables.
    • It uses structured data collection procedures.
    • It produces numerical results.
    • It applies statistical or mathematical analysis.
    • It may test hypotheses or estimate relationships between variables.
    • It can estimate population patterns when sampling and measurement are appropriate.

    Quantitative research can support comparisons and statistical generalizations, but the quality of its conclusions depends on factors such as sampling, measurement accuracy, study design, and the suitability of the statistical analysis.

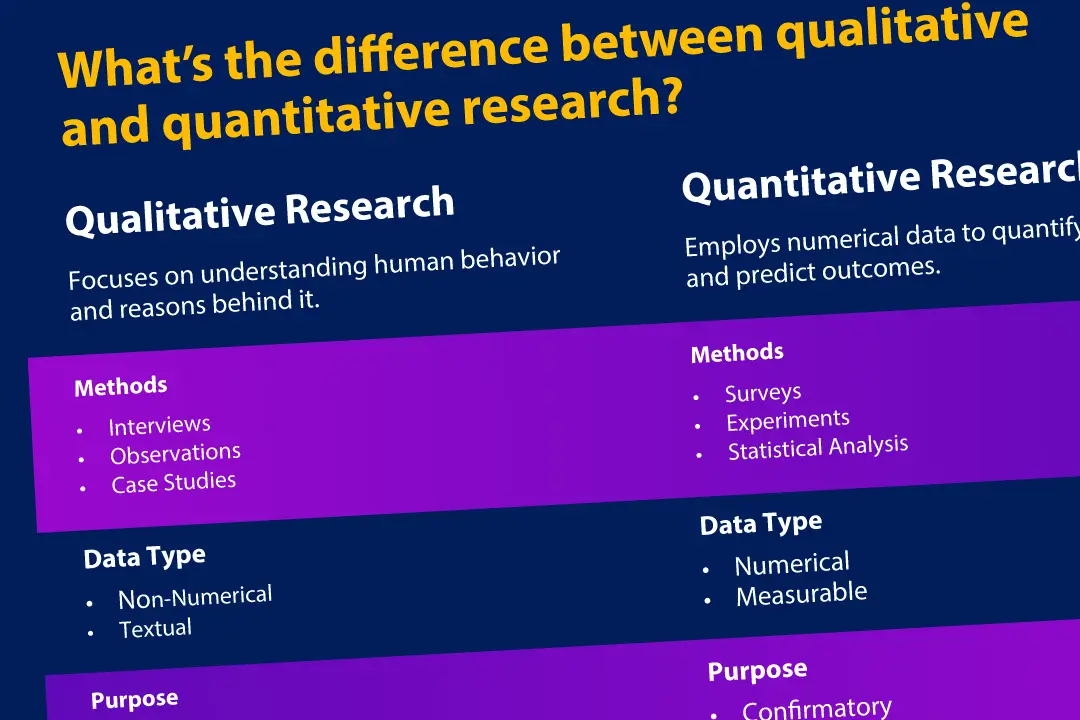
    Qualitative vs Quantitative Research: Key Differences

    The main difference between qualitative and quantitative research is the type of question each approach is designed to answer and the evidence used to answer it.

    FeatureQualitative ResearchQuantitative Research
    Main purposeUnderstand experiences, meanings, and processesMeasure variables, patterns, and relationships
    Data typePrimarily non-numericalPrimarily numerical
    Typical questionsHow? Why? What does it mean?How many? How much? How often?
    Common methodsInterviews, focus groups, observations, document analysisStructured surveys, experiments, numerical datasets
    Sample selectionOften purposive or based on relevant experienceOften structured to support comparison or statistical inference
    AnalysisThemes, patterns, interpretationsStatistical calculations, comparisons, models
    Typical resultsDetailed descriptions and contextual insightsNumerical summaries, estimates, and statistical relationships
    Research designMay be flexible and develop during the studyOften specifies measurements and procedures in advance
    StrengthExplains complexity and contextMeasures patterns and supports numerical comparisons
    Common limitationFindings may not transfer to other settings without careful assessmentNumerical results may overlook context or depend on imperfect measurements

    These are general tendencies, not absolute rules. Qualitative researchers can count themes, quantitative researchers can use written responses that are coded into numerical categories, and some studies combine both types of evidence.

    Examples of Qualitative and Quantitative Research

    Looking at practical examples makes the difference easier to understand.

    Example 1: Student Satisfaction With Online Learning

    Qualitative approach: Interview students about their experiences with online classes. Analyze their responses to identify themes such as flexibility, isolation, technical difficulties, and instructor support.

    Quantitative approach: Ask students to rate their satisfaction on a five-point scale. Calculate average ratings and compare responses across groups.

    The qualitative approach helps explain what students value or struggle with. The quantitative approach shows how satisfaction ratings are distributed and whether measurable differences appear between groups.

    Example 2: Study Habits and Examination Performance

    Qualitative approach: Conduct interviews to explore how students plan revision sessions, manage distractions, and respond to exam pressure.

    Quantitative approach: Collect information about study hours and examination scores, then examine whether the variables are associated.

    The numerical approach can identify a relationship, but additional evidence is needed to determine whether more study time causes higher scores. The qualitative approach can help explain students’ strategies and the circumstances influencing their study habits.

    Example 3: Classroom Participation

    Qualitative approach: Observe classroom discussions and interview students about what encourages or discourages them from speaking.

    Quantitative approach: Record the number of times students contribute during lessons and compare participation rates across defined conditions.

    Combining these methods could help researchers measure participation and understand the reasons behind it.

    Example 4: Public Health Awareness

    Qualitative approach: Interview community members about their understanding of a health campaign and the barriers they face when following its recommendations.

    Quantitative approach: Survey a larger group to measure awareness levels or estimate the proportion of people who recognize particular recommendations.

    The choice depends on whether the primary objective is to understand people’s perspectives, estimate the prevalence of awareness, or address both questions.

    Advantages of Qualitative Research

    Qualitative research offers several important benefits, especially when studying complex human experiences or topics that are not easily reduced to numbers.

    1. Provides In-Depth Understanding

    Open-ended questions allow participants to explain their experiences in their own words. Researchers can investigate details that a fixed-response questionnaire might miss.

    2. Explores Context and Meaning

    Human behavior is influenced by social, cultural, institutional, and personal circumstances. Qualitative research can examine these influences in detail.

    3. Identifies Unexpected Insights

    Participants may raise issues that researchers did not anticipate. These insights can help refine research questions and suggest areas for further investigation.

    4. Supports Exploratory Research

    When little is known about a subject, qualitative methods can help researchers develop concepts, identify relevant factors, and formulate questions for future studies.

    Limitations of Qualitative Research

    Qualitative research also has limitations. Collecting and analyzing detailed interviews or observations can take considerable time. Interpretation requires careful judgment, and researchers must consider how their own assumptions may influence the analysis.

    Because qualitative studies often focus on specific participants or settings, their findings do not automatically apply to wider populations. Researchers should explain the study context and provide enough evidence for readers to assess whether the insights may be relevant elsewhere.

    Advantages of Quantitative Research

    Quantitative research is particularly useful when a study needs to measure variables consistently, compare groups, or examine numerical patterns.

    1. Enables Clear Numerical Comparisons

    Researchers can compare averages, percentages, rates, and other measurements across groups, time periods, or conditions.

    2. Supports Statistical Analysis

    Appropriate statistical methods can help estimate relationships, evaluate differences, quantify uncertainty, and test hypotheses.

    3. Can Examine Larger Populations

    When a study uses suitable sampling and measurement procedures, quantitative methods can support estimates about a broader population.

    4. Improves Measurement Consistency

    Structured instruments and predefined procedures can help researchers collect comparable data across participants or settings.

    Limitations of Quantitative Research

    Quantitative research can overlook important experiences if the chosen measurements do not capture the full complexity of a topic. A survey may reveal that students report low motivation, for instance, without explaining the underlying reasons.

    Results can also be misleading when survey questions are poorly designed, measurements are inaccurate, samples are biased, or statistical methods are inappropriate. Numerical precision does not guarantee that a study’s conclusions are valid.

    When Should You Use Qualitative Research?

    Qualitative research is often a suitable choice when your main goal is to explore experiences, understand perspectives, investigate processes, or develop an in-depth explanation.

    Consider a qualitative approach when:

    • You want to understand why people behave in a particular way.
    • Your research question focuses on personal experiences or interpretations.
    • The topic is complex or not well understood.
    • You need detailed descriptions of a specific situation.
    • You want to explore possible explanations before designing a larger study.
    • Your evidence will primarily come from interviews, observations, or documents.

    For example, if you want to understand why first-year university students feel anxious about participating in class, interviews may reveal concerns that a rating scale alone would not explain.

    Qualitative research is not limited to small projects, and it is not automatically easier than quantitative research. Designing effective interviews, handling data responsibly, and analyzing themes systematically require careful planning.

    When Should You Use Quantitative Research?

    Quantitative research is often appropriate when you need to measure something, compare defined groups, estimate frequencies, or examine relationships between variables.

    Consider a quantitative approach when:

    • Your research question asks how many, how much, or how often.
    • You need to compare measurable outcomes.
    • You want to test a clearly defined hypothesis.
    • You have access to suitable numerical data.
    • You need to estimate a population characteristic using an appropriate sample.
    • You want to measure changes across time or conditions.

    For example, if you want to estimate how frequently students use digital learning platforms, a structured survey may provide more useful evidence than a series of open-ended interviews.

    Before selecting a quantitative design, ensure that your variables can be measured meaningfully and that the data collection process fits the question you want to answer.

    What Is Mixed-Methods Research?

    Mixed-methods research combines qualitative and quantitative approaches within a single study or coordinated research program. Researchers use it when numerical measurements and detailed explanations can contribute different but complementary insights.

    For example, a university may investigate student satisfaction with a new learning platform using two methods:

    1. Distribute a structured survey to measure satisfaction across a broad group of students.
    2. Interview selected students to explore the reasons behind their ratings.

    The survey identifies patterns, while the interviews help explain the experiences behind those patterns.

    Common Mixed-Methods Designs

    Explanatory sequential design: Researchers collect and analyze quantitative data first, then use qualitative research to help explain the results.

    Exploratory sequential design: Researchers begin with qualitative exploration and use what they learn to develop a questionnaire, measurement instrument, or later quantitative study.

    Convergent design: Researchers collect qualitative and quantitative data during a similar period and compare or integrate the findings.

    Mixed-methods research can provide a more comprehensive understanding, but it requires a clear plan for combining the results. Simply collecting numbers and interviews does not automatically make a study effective. The two forms of evidence should contribute to answering the research question.

    How to Choose the Right Research Method for Your Project

    If you are unsure which approach to use, begin with the research question rather than your preferred data collection method.

    Step 1: Identify Your Main Objective

    Decide whether you primarily want to explore experiences, measure a pattern, test a relationship, or answer several types of questions.

    Your objective should determine the method, not the other way around.

    Step 2: Examine the Type of Evidence You Need

    Ask what information would provide a convincing answer.

    If you need detailed explanations of participants’ experiences, interviews may be suitable. If you need to estimate how common a behavior is, a structured survey may be more appropriate.

    Step 3: Consider Your Resources

    Evaluate the time, budget, skills, equipment, source access, and participant access available to you. A method that is theoretically suitable may not be practical for your assignment.

    Choose a manageable design that can still produce credible evidence.

    Step 4: Review Ethical Requirements

    Research involving people may require informed consent, confidentiality protections, institutional permission, or formal ethical review. Your responsibilities depend on the project and your institution’s rules.

    Select a method that you can carry out ethically and responsibly.

    Step 5: Check the Requirements of Your Assignment

    Your instructor may specify a research design, required data sources, minimum sample size, or analysis technique. Confirm these requirements before collecting data.

    Step 6: Make Sure Your Analysis Fits Your Question

    Think about how you will analyze the evidence before collecting it. If you plan to use numerical measurements, determine which calculations are appropriate. If you plan to use interviews, decide how you will organize and interpret the responses.

    Planning analysis early helps you avoid collecting information that cannot answer your research question.

    For further guidance, see our article on 

    Common Misconceptions About Qualitative and Quantitative Research

    Several misunderstandings can lead students to choose an unsuitable method or interpret findings incorrectly.

    Misconception 1: Quantitative Research Is Always More Scientific

    Numerical data can support rigorous analysis, but quality depends on the research design, measurements, sampling, and interpretation. A poorly designed survey can produce misleading results just as a poorly conducted interview study can.

    Misconception 2: Qualitative Research Is Just Personal Opinion

    Qualitative research uses systematic procedures for collecting, organizing, and analyzing evidence. Researchers should explain their methods, support interpretations with data, and consider alternative explanations.

    Misconception 3: Qualitative Research Cannot Include Numbers

    Qualitative studies may count themes, compare the frequency of ideas, or include descriptive statistics. However, the central purpose remains understanding meanings, experiences, or processes rather than primarily measuring variables.

    Misconception 4: Quantitative Research Always Requires a Large Sample

    Sample size depends on the research question, design, variability, intended analysis, and desired precision. Some quantitative studies use small samples, although their conclusions may be limited. Researchers should justify sample size rather than assume that bigger is always better.

    Misconception 5: Mixed Methods Are Always the Best Choice

    Combining methods can be useful, but it adds complexity and requires sufficient time and expertise. A well-designed qualitative or quantitative study may be more appropriate when it fully addresses the research question.

    How to Improve the Quality of Your Research

    Regardless of which method you choose, certain practices help make research more credible and useful.

    • Use a clear research question: A focused question guides every stage of the project.
    • Choose suitable methods: Make sure your data collection approach matches your objectives.
    • Use credible sources: Evaluate academic articles, reports, datasets, and other evidence carefully.
    • Document your procedures: Record how you selected sources, recruited participants, collected data, and analyzed findings.
    • Consider bias: Think about how sampling, wording, researcher expectations, or missing data might affect the results.
    • Protect participants: Follow applicable privacy, consent, and ethical requirements.
    • Acknowledge limitations: Explain what your design can and cannot establish.
    • Keep conclusions evidence-based: Do not make stronger claims than the data supports.
    • Revise your report: Check clarity, structure, accuracy, and referencing before submission.

    These practices are important for school assignments, undergraduate research, graduate projects, and professional investigations.

    Frequently Asked Questions

    What is the main difference between qualitative and quantitative research?

    Qualitative research primarily explores experiences, meanings, and processes using detailed non-numerical evidence. Quantitative research primarily measures variables and examines numerical patterns using statistical or mathematical analysis. The appropriate approach depends on the research question.

    Which is better, qualitative or quantitative research?

    Neither approach is universally better. Qualitative research is useful for understanding experiences and context, while quantitative research is useful for measurement, numerical comparison, and statistical analysis. The best method is the one that fits your objectives and available evidence.

    Can a research project use both qualitative and quantitative methods?

    Yes. Mixed-methods research combines both approaches to answer complementary questions. For example, a researcher may use a survey to measure student satisfaction and interviews to understand why students gave particular ratings.

    What are examples of qualitative research?

    Examples include interviewing students about their classroom experiences, observing how people interact in a workplace, analyzing personal narratives, and examining how communities interpret a social issue.

    What are examples of quantitative research?

    Examples include measuring exam scores, surveying how frequently students use a learning platform, comparing average results between groups, and analyzing numerical trends in public datasets.

    Is a questionnaire qualitative or quantitative research?

    It depends on the questions and how the responses are analyzed. A questionnaire with fixed response options or rating scales is often quantitative. A questionnaire with open-ended questions can generate qualitative data. A questionnaire containing both may support a mixed-methods design.

    What is the difference between qualitative and quantitative data?

    Qualitative data generally describes experiences, meanings, categories, or observations using words and other non-numerical forms. Quantitative data represents quantities or measurements that can be expressed numerically. The way information is collected and analyzed determines how it is used in a study.

    Can qualitative research prove cause and effect?

    Qualitative research can help explain processes and suggest possible causal mechanisms, especially when evidence is collected carefully over time and across relevant contexts. However, causal claims require a research design and evidence suited to evaluating alternative explanations. No single method automatically guarantees a causal conclusion.

    Conclusion

    Understanding qualitative vs quantitative research helps students choose a method that fits their academic objectives. Qualitative research offers detailed insight into people’s experiences, meanings, and behavior, while quantitative research measures variables and examines numerical patterns. Mixed-methods research combines both when a question benefits from complementary forms of evidence.

    Before choosing an approach, define your research question, identify the evidence needed to answer it, consider your available resources, and review any ethical or assignment requirements. Then select methods that allow you to collect and analyze relevant information systematically.

    The most effective research is not necessarily the most complicated. It is research that asks a clear question, uses appropriate evidence, acknowledges limitations, and draws conclusions that the findings can genuinely support.

  • How to Conduct a Student Research Project From Start to Finish

    How to Conduct a Student Research Project From Start to Finish

    A student research project is an opportunity to explore a topic in depth, develop critical thinking skills, and learn how to find and evaluate reliable information. Whether you are completing a high school assignment, an undergraduate paper, or a university research project, following a clear process can make the work more manageable and improve the quality of your results.

    Learning how to conduct a student research project involves more than collecting information from books and websites. You need to identify a focused research question, review existing sources, select an appropriate method, analyze your findings, and communicate your conclusions clearly.

    This guide explains each stage of the research process, from choosing a topic to submitting the final report. It also includes practical tips, common mistakes to avoid, and a checklist to help you stay organized.

    What Is a Student Research Project?

    A student research project is a structured investigation designed to answer a question, examine a problem, or explore a specific subject. Depending on the assignment, it may involve reviewing published research, conducting experiments, collecting survey responses, analyzing existing data, or comparing different viewpoints.

    Most student research projects follow a similar sequence:

    1. Choose a research topic.
    2. Develop a research question.
    3. Find and evaluate credible sources.
    4. Review existing information.
    5. Plan the research method.
    6. Collect and organize data.
    7. Analyze the findings.
    8. Write the research report.
    9. Cite sources and check academic integrity.
    10. Revise and submit the project.

    The exact requirements depend on your subject, educational level, and instructor’s guidelines. Always review the assignment instructions before beginning.

    Step 1: Choose a Clear and Manageable Research Topic

    Choosing the right topic is the foundation of a successful research project. A topic that is too broad can make it difficult to decide what information to include. A topic that is too narrow may not provide enough evidence to support a meaningful investigation.

    Start with a subject that interests you and connects to your course. Consider what you already know, what you would like to understand better, and what questions remain unanswered.

    For example, instead of choosing a broad topic such as climate change, you could investigate how school recycling programs influence student waste-management habits.

    Before finalizing your topic, ask yourself:

    • Is the subject relevant to my course or assignment?
    • Can I find enough reliable information about it?
    • Can I investigate it within the available time?
    • Do I have access to the sources, materials, or participants I need?
    • Can I approach the topic objectively?

    A manageable topic makes it easier to conduct focused research and produce a coherent final report.

    How to Narrow a Broad Topic

    Use three simple steps to refine your idea:

    Start with a general subject: Online learning.

    Identify a specific area: Student engagement during online classes.

    Define a focused question: What factors influence student participation in live online classes at the secondary school level?

    This progression turns a broad interest into a question that can guide your research.

    Step 2: Develop a Strong Research Question

    Your research question explains exactly what you want to discover. It guides your source selection, research methods, analysis, and conclusions.

    A strong research question should be clear, specific, relevant, and answerable using the resources available to you.

    For example:

    • Too broad: Is technology good for education?
    • More focused: How do digital flashcards affect vocabulary revision among university students?
    • Potentially researchable: How do university students describe the usefulness of digital flashcards when preparing for vocabulary tests?

    The best wording depends on whether your project uses numerical data, interviews, experiments, or existing literature.

    Avoid questions that can be answered with a simple yes or no unless the assignment specifically requires that format. Questions beginning with how, why, what factors, or to what extent often encourage deeper investigation.

    Once you have a draft question, check it against your assignment requirements. If it would take a book-length study to answer, narrow it further.

    Step 3: Set Research Objectives

    Research objectives break your main question into smaller tasks. They help you understand what you need to accomplish and make it easier to evaluate whether your project is complete.

    For a project about digital flashcards, your objectives might be to:

    1. Identify common ways students use digital flashcards.
    2. Examine students’ perceptions of their usefulness.
    3. Compare reported study habits among participants.
    4. Discuss the limitations of the available evidence.

    Keep your objectives realistic and closely connected to your research question. Each objective should contribute something meaningful to the final answer.

    If your instructor requires a hypothesis, develop one based on your preliminary reading and the nature of your research. A hypothesis is a testable prediction, not a conclusion that you must prove. Your findings may support it, challenge it, or show that the evidence is inconclusive.

    Step 4: Find Reliable Research Sources

    Once your topic and question are clear, begin gathering background information. Good sources help you understand the subject, identify existing knowledge, and discover where further investigation may be useful.

    Useful sources include:

    • Peer-reviewed academic journal articles.
    • Scholarly books and textbooks.
    • University and research institution publications.
    • Government reports and official statistics.
    • Reputable professional organizations.
    • Original datasets and primary documents relevant to your question.

    You can search academic databases, university library catalogues, and scholarly search engines. Use several combinations of keywords rather than relying on a single search phrase.

    For example, a project on student participation in online classes might use search terms such as “online learning engagement,” “virtual classroom participation,” and “factors affecting student engagement.”

    How to Evaluate a Source

    Before using a source, assess its credibility and relevance.

    Authority: Who wrote or published it? Do the authors have relevant expertise?

    Evidence: Does it provide data, references, methods, or supporting examples?

    Currency: Is the information recent enough for your topic? Some historical or theoretical sources remain valuable, while fast-changing subjects may require newer evidence.

    Purpose: Is the source intended to inform, persuade, advertise, or promote a particular position?

    Relevance: Does it directly help answer your research question?

    Do not assume that every result from an academic-looking website is reliable. Check the original publication whenever possible, especially when a source makes a surprising or important claim.

    For more guidance, see our article on how to find reliable research sources.

    Step 5: Review Existing Research

    A literature review summarizes and evaluates what other researchers have already discovered about your topic. It helps you understand the current state of knowledge and place your own investigation in context.

    A literature review is not simply a list of article summaries. It should identify patterns, disagreements, limitations, and unanswered questions across multiple sources.

    As you read, consider:

    • What findings appear consistently across studies?
    • Where do researchers disagree?
    • Which methods have been used?
    • What limitations affect the existing evidence?
    • How does each source relate to your research question?

    Organize your notes by themes rather than writing one paragraph for every source. For example, a project about online learning might group research under internet access, teaching methods, student motivation, and classroom interaction.

    Keep accurate records of each source’s author, title, publication date, publisher or journal, and DOI or URL when applicable. Recording these details early makes citation easier later.

    Step 6: Choose the Right Research Method

    Your research method explains how you will answer the question. The method should fit your objectives, available resources, ethical responsibilities, and assignment requirements.

    Common approaches include the following.

    Qualitative Research

    Qualitative research explores experiences, opinions, meanings, or processes. Methods may include interviews, focus groups, observations, and analysis of written material.

    For example, you could interview a small group of students to understand what makes online classes easier or harder to participate in.

    Qualitative research can provide detailed insights, but the findings may not represent the experiences of a wider population.

    Quantitative Research

    Quantitative research uses numerical information to measure patterns, compare groups, or examine relationships between variables.

    For example, you could use a structured questionnaire to count how frequently students participate in online classes and compare responses across different groups.

    Quantitative research requires careful measurement and appropriate analysis. A larger sample does not automatically make a study reliable if the sampling method or questions are flawed.

    Mixed-Methods Research

    Mixed-methods research combines qualitative and quantitative approaches. A student might collect questionnaire responses and then interview a smaller group to understand the reasons behind the numerical patterns.

    This approach can offer a broader understanding, although it may require additional time and planning.

    Secondary Research

    Secondary research uses existing studies, published datasets, reports, books, or other previously collected information. It is often appropriate when students have limited time, equipment, or access to participants.

    Before selecting a method, compare the options with your research question and the instructions provided by your teacher or supervisor.

    Step 7: Create a Research Plan and Timeline

    A research plan turns a large assignment into a series of manageable tasks. It also helps you identify problems before they become urgent.

    Start by confirming the submission deadline, required word count, formatting rules, and any presentation or supplementary material requirements. Then estimate how much time each stage will take.

    A simple four-week plan could look like this:

    WeekMain tasks
    Week 1Choose a topic, refine the question, and conduct preliminary reading
    Week 2Complete the literature review and finalize the research method
    Week 3Collect or analyze information and organize the findings
    Week 4Write the report, revise the draft, check citations, and submit

    This is only an example. A short classroom project may take less time, while a laboratory study or extended dissertation may require several months.

    Build some flexibility into your schedule. Sources may be difficult to access, data collection may take longer than expected, and your first draft will probably need revision.

    Step 8: Collect and Organize Your Data

    Data collection is the stage where you gather the evidence needed to answer your research question. The process depends on your chosen method.

    For a literature-based project, this may involve systematically recording findings from published studies. For an experiment, it could mean measuring results under defined conditions. For a survey, it may involve gathering responses from eligible participants.

    Keep a clear record of how information was collected. Include dates, relevant procedures, source details, and any changes made to the original plan.

    A spreadsheet can help you organize numerical data, while a note-taking document or reference manager can help manage articles and written observations.

    Use consistent labels and file names so you can locate information quickly. Keep original data separate from edited or analyzed versions, and maintain backups of important files.

    If your research involves people, follow your institution’s requirements for informed consent, privacy, confidentiality, and research approval. Do not collect sensitive personal information unnecessarily. Projects involving minors or vulnerable participants may require additional safeguards and permission.

    Never invent results, change observations to fit a preferred conclusion, or present another person’s work as your own.

    Step 9: Analyze the Findings

    Once you have collected your information, examine it systematically. Analysis helps you identify what the evidence shows and how it relates to your research question.

    For quantitative data, you might calculate totals, percentages, averages, or other statistics appropriate to the dataset. Charts and tables can help communicate patterns clearly. More advanced analyses should be used only when they fit the research design and your level of training.

    For qualitative data, you might group interview responses into themes, compare recurring ideas, and examine differences between participants’ experiences. Keep the original context in mind rather than selecting only statements that support your expectations.

    During analysis, ask:

    • What patterns or differences can I identify?
    • Which findings are most relevant to my research question?
    • Are there unexpected or contradictory results?
    • Could the data collection method have influenced the findings?
    • What limitations should readers understand?

    Be careful when interpreting relationships between variables. If two things occur together, that does not necessarily mean one caused the other.

    For instance, students who use a particular study app may achieve higher scores, but other factors—such as prior knowledge, study time, or motivation—could help explain the difference.

    A strong analysis describes the evidence accurately and distinguishes observed results from possible explanations.

    Step 10: Write the Research Report

    Your report should guide readers through the question, evidence, methods, findings, and conclusions in a logical order. Follow your instructor’s required structure if one has been provided.

    A typical research report includes the following sections.

    Title Page

    Include the project title and any required details, such as your name, course, institution, instructor, and submission date.

    Abstract or Executive Summary

    If required, provide a brief overview of the research question, methods, main findings, and conclusion. It is usually easier to write this section after completing the report.

    Introduction

    Introduce the topic, explain why it matters, present the research question, and state the objectives. Give readers enough background to understand the problem without including every detail from your literature review.

    Literature Review

    Summarize and critically evaluate relevant existing research. Explain the main themes, agreements, disagreements, and gaps that relate to your project.

    Methodology

    Describe what you did and why you chose that approach. Depending on the project, include the research design, data sources, participants, materials, procedures, and analysis methods.

    Provide enough detail for readers to understand how the work was conducted.

    Results or Findings

    Present the evidence clearly. Use tables, figures, quotations, or numerical summaries where appropriate. Keep interpretation limited if your required structure separates results from discussion.

    Discussion

    Explain what the findings mean in relation to your research question and existing literature. Address unexpected results, possible explanations, and the limitations of your study.

    Conclusion

    Summarize the main answer to your research question. Highlight the most important findings, acknowledge significant limitations, and suggest a useful direction for future research if appropriate.

    Avoid introducing major new evidence in the conclusion.

    References

    List every source cited in the report using the citation style required by your institution. Check that in-text citations and reference-list entries match.

    For additional help, read our guide to academic citation styles.

    Step 11: Cite Sources and Maintain Academic Integrity

    Proper referencing gives credit to the original authors and allows readers to verify your evidence. It also helps you distinguish your own analysis from information drawn from other work.

    Use the citation style required by your instructor, such as APA, MLA, or Chicago. Different styles have different rules for in-text citations, footnotes, and reference lists.

    Whenever you use another person’s words, quote them accurately and provide a citation. When paraphrasing, express the idea in your own wording and sentence structure while still citing the source. Changing only a few words from the original text is not a reliable paraphrasing method.

    AI tools may help with brainstorming, outlining, or explaining difficult concepts, depending on your institution’s rules. However, verify their claims against trustworthy sources, do not invent references, and disclose AI assistance when required.

    Review your institution’s academic integrity policy before submitting the project. You are responsible for the accuracy and originality of the final work.

    Step 12: Revise, Proofread, and Submit

    Your first draft is a starting point, not the final version. Revision allows you to improve the argument, remove irrelevant material, correct errors, and make the report easier to follow.

    Review your work in several passes.

    Content review: Does the report answer the research question? Are the conclusions supported by the evidence?

    Structure review: Are the sections in a logical order? Does each paragraph contribute to the main purpose?

    Evidence review: Are factual claims supported by appropriate sources? Have you acknowledged contradictory evidence and limitations?

    Language review: Are sentences clear, precise, and appropriate for academic writing? Have you removed unnecessary repetition?

    Formatting review: Do headings, tables, figures, page numbers, and citations follow the required style?

    Final submission review: Does the file open correctly? Have you included all required attachments, appendices, or supplementary materials?

    Reading the report aloud can help you spot awkward sentences. If possible, ask a classmate, tutor, or supervisor to review a draft and identify areas that are unclear.

    Leave enough time for these final checks rather than submitting immediately after finishing the last paragraph.

    Common Mistakes to Avoid in a Student Research Project

    Even well-prepared students can make mistakes that weaken their research. Recognizing these problems early can save time and improve the final report.

    Choosing a Topic That Is Too Broad

    A broad topic encourages scattered research and makes it difficult to reach a clear conclusion. Narrow your focus to a specific question, population, period, or problem.

    Relying on the First Search Results

    Search rankings do not guarantee accuracy. Compare sources, check publication details, and trace important claims back to the original evidence whenever possible.

    Collecting Information Without a Plan

    Gathering large amounts of material can feel productive, but information is useful only when it serves the research question. Use your objectives to decide what to include.

    Ignoring Research Limitations

    Every project has limitations, whether related to sample size, data quality, available time, or the scope of the literature. Acknowledging them demonstrates critical thinking and helps readers interpret your findings correctly.

    Leaving Citations Until the End

    Trying to reconstruct missing source details can be frustrating and may lead to referencing errors. Record complete source information as soon as you begin using it.

    Making Conclusions That Go Beyond the Evidence

    Your conclusion should reflect what the data and sources actually support. Avoid exaggerating findings, treating opinions as facts, or claiming that a small study proves a universal rule.

    Starting the Writing Process Too Late

    Writing requires time for organizing evidence, explaining reasoning, and revising. Begin drafting sections as soon as you have enough reliable material, even if some findings are still being developed.

    Tips for Making Your Research Project More Effective

    A few practical habits can make the research process smoother and more productive.

    • Keep a research journal. Record questions, decisions, challenges, and changes to your plan.
    • Use a reference manager or organized source log. This reduces the risk of losing citation information.
    • Back up your work. Store copies of important documents and data in a secure location.
    • Ask for feedback early. Confirm that your research question and method are appropriate before investing too much time.
    • Separate evidence from interpretation. This helps you write more objective findings and discussions.
    • Use visuals when they add value. Tables, diagrams, and charts should clarify information rather than decorate the report.
    • Protect your time. Work toward small milestones instead of waiting for a long block of free time.
    • Follow ethical guidelines. Respect privacy, obtain required permissions, and report your findings honestly.

    Most importantly, remain open to unexpected results. Research is a process of investigation, not an exercise in proving that your initial assumptions were correct.

    Student Research Project Checklist

    Before submitting your project, use this checklist to confirm that the main stages are complete.

    • I have chosen a focused and manageable topic.
    • My research question and objectives are clear.
    • I have reviewed relevant and credible sources.
    • My research method fits the question and assignment.
    • I have followed applicable ethical and privacy requirements.
    • My data and research notes are organized.
    • My analysis accurately reflects the evidence.
    • My report follows the required structure.
    • I have cited sources and checked my reference list.
    • I have acknowledged important limitations.
    • I have revised, proofread, and checked the formatting.
    • My final file meets the submission requirements.

    Frequently Asked Questions

    How do you conduct a student research project?

    Begin by selecting a focused topic and developing a clear research question. Find credible sources, review existing research, choose an appropriate method, collect and analyze information, and write a structured report. Finish by checking citations, revising the draft, and following your instructor’s submission requirements.

    What are the main steps of a research project?

    The main steps are choosing a topic, defining the research question, setting objectives, reviewing literature, selecting a method, collecting data, analyzing findings, writing the report, referencing sources, and revising the final document.

    How long does a student research project take?

    The time required depends on the project’s length, subject, research method, and submission deadline. A short classroom assignment may take a few days or weeks, while an extensive university project can take several months. Create a timeline that includes research, writing, and revision.

    What makes a student research project successful?

    A successful project has a focused question, credible evidence, a suitable research method, careful analysis, clear writing, accurate citations, and conclusions supported by the findings. Following the assignment requirements and managing time effectively are also important.

    Can I use online sources for my research project?

    Yes. Reliable online sources include scholarly articles, university publications, government reports, academic databases, and reputable research organizations. Evaluate each source’s authority, evidence, currency, purpose, and relevance before relying on it.

    What is the difference between a research question and a hypothesis?

    A research question identifies what you want to investigate. A hypothesis is a testable prediction about a possible result or relationship. Some projects require a hypothesis, while exploratory or qualitative projects may be guided by research questions alone.

    How can I avoid plagiarism in my research project?

    Keep accurate source records, cite borrowed ideas, use quotation marks for direct quotations, and paraphrase genuinely in your own words. Follow the required citation style and check your institution’s rules on collaboration and AI assistance.

    Conclusion

    Learning how to conduct a student research project from start to finish becomes easier when you divide the work into clear stages. Begin with a manageable topic, develop a focused research question, evaluate your sources carefully, and select a method that fits your objectives. Then collect and analyze evidence, write a structured report, and revise it before submission.

    Good research is not about gathering the largest amount of information or reaching the most impressive conclusion. It is about asking a meaningful question, using appropriate evidence, explaining your reasoning, and being honest about what the findings can and cannot show.

    By following a systematic process and allowing enough time for each stage, you can develop stronger research skills and produce work that is clearer, more credible, and more useful for your academic development.

  • How to Prepare and Deliver an Effective Class Presentation

    How to Prepare and Deliver an Effective Class Presentation

    Giving a class presentation can feel challenging, especially when you need to explain a difficult topic, speak in front of classmates, or answer questions from your teacher. However, an effective presentation is not about being the loudest speaker or using the most impressive slides. It is about communicating your ideas clearly, keeping your audience interested, and demonstrating that you understand your subject.

    Learning how to give a class presentation is a valuable skill for students at school, college, and university. It can help you improve your communication, build confidence, organize information, and perform more effectively in academic settings.

    The good news is that presentation skills can be developed through preparation and practice. By choosing a clear message, organizing your material, designing readable slides, rehearsing your delivery, and managing nervousness, you can turn an ordinary class assignment into a more engaging learning experience.

    In this guide, you will learn how to prepare and deliver an effective class presentation, avoid common mistakes, use visual aids wisely, and handle questions with confidence.

    What Makes a Class Presentation Effective?

    An effective class presentation communicates a clear message in a way that is easy for the audience to understand and remember.

    A strong presentation usually includes five essential elements:

    • Clear purpose: The audience understands what the presentation is about and why the topic matters.
    • Logical organization: Ideas follow a sequence that is easy to understand.
    • Accurate information: Facts, examples, and research support the main points.
    • Engaging delivery: The speaker uses an appropriate pace, clear language, and natural body language.
    • Relevant visual aids: Slides, images, charts, or demonstrations support the message instead of distracting from it.

    A successful presentation does not need complicated graphics, lengthy slides, or memorized speeches. Clear explanations and thoughtful preparation are often more effective than unnecessary decoration.

    1. Understand the Assignment and Its Requirements

    Before researching your topic, make sure you understand what your teacher expects.

    Read the assignment instructions carefully and identify the main requirements. These may include the topic, presentation length, number of slides, research expectations, citation rules, and whether you must present individually or as part of a group.

    Ask yourself the following questions:

    • What specific question or topic must I explain?
    • How long should the presentation last?
    • Who will be listening?
    • Do I need academic sources or references?
    • Am I expected to use slides, handouts, or a live demonstration?
    • Will the teacher ask questions afterward?
    • How will the presentation be assessed?

    For example, a five-minute presentation about climate change requires a different level of detail from a twenty-minute university presentation on climate policy.

    Understanding the requirements early helps you avoid spending time on irrelevant information and ensures that your presentation meets the assignment criteria.

    Practical tip: Turn the assignment instructions into a short checklist. Review it again before submitting your slides or delivering your presentation.

    2. Research Your Topic Using Reliable Sources

    Good presentations begin with accurate and relevant information. Research helps you understand the topic well enough to explain it in your own words.

    Start with your textbook, course materials, library resources, and reputable educational or institutional websites. Depending on your subject, academic journal articles, government reports, and publications from recognized organizations may also be useful.

    When evaluating a source, consider:

    • Authority: Does the author or organization have relevant expertise?
    • Accuracy: Are claims supported by evidence?
    • Relevance: Does the information directly support your presentation’s purpose?
    • Currency: Is the information recent enough for your topic?
    • Purpose: Is the source intended to inform, persuade, advertise, or entertain?

    Avoid relying entirely on the first website that appears in a search. Compare sources when the topic involves disputed claims or changing information.

    Take useful research notes

    As you research, record the main ideas rather than copying entire paragraphs into your notes. Keep track of the author, title, publication date, and URL or DOI for every source you may use.

    This makes it easier to create a reference slide and acknowledge other people’s work correctly.

    For additional research guidance, see how to research a topic and find reliable sources.

    3. Define the Main Message of Your Presentation

    Once you have gathered enough information, decide what you want your audience to learn.

    A common mistake is trying to include everything you discovered during research. Too much information can make a presentation confusing and difficult to remember.

    Instead, write one sentence that summarizes your central message.

    For example, if your topic is renewable energy, your main message might be:

    “Renewable energy can reduce dependence on fossil fuels, but its successful adoption requires investment, suitable infrastructure, and careful planning.”

    This statement gives your presentation direction. Each major point should help explain or support it.

    Use three main points when appropriate

    For a short class presentation, organizing your content around three main points can be an effective starting point.

    A presentation about renewable energy might cover:

    1. The main types of renewable energy.
    2. Their environmental and economic benefits.
    3. The challenges involved in adopting them.

    Three points are not a strict rule. More complex subjects may require additional sections, while very short presentations may need only one or two. Choose the number that fits your time and assignment.

    4. Create a Clear Presentation Structure

    A well-organized presentation helps the audience follow your reasoning from beginning to end.

    Most class presentations can be divided into three main sections: introduction, body, and conclusion.

    Introduction

    Your introduction should establish the topic, explain its importance, and give the audience a sense of what to expect.

    A useful introduction includes:

    • A greeting or brief opening statement.
    • The presentation topic.
    • A short explanation of why the topic matters.
    • The main question or objective.
    • A brief overview of the key points.

    For example:

    “Good morning, everyone. Today, I will explain how renewable energy works, why it matters, and what challenges affect its wider use. By the end of this presentation, you should understand both the benefits and the limitations of renewable energy.”

    Keep your opening focused. You do not need a long personal story or an elaborate quotation unless it genuinely helps introduce the topic.

    Body

    The body contains the main information and supporting evidence.

    Arrange the sections in a logical order. You might move from basic concepts to examples, from a problem to possible solutions, or from historical background to current developments.

    For each main point:

    1. State the idea clearly.
    2. Explain what it means.
    3. Support it with evidence, an example, or a demonstration.
    4. Explain why it matters.
    5. Connect it to the next point.

    This approach helps prevent the presentation from becoming a list of disconnected facts.

    Conclusion

    Your conclusion should bring the presentation together and reinforce the main message.

    Briefly summarize the most important points, explain the central takeaway, and end with a clear closing statement.

    For example:

    “To conclude, renewable energy offers important environmental and energy-security benefits, but successful adoption depends on investment, infrastructure, and reliable planning. Understanding both the opportunities and the challenges helps us evaluate its role in the future.”

    Avoid introducing several new arguments in the final moments. The conclusion should help your audience remember what they have learned.

    5. Plan Your Time Before Creating Slides

    Time management is an important part of presentation preparation. A well-researched presentation can still be ineffective if the speaker rushes through the main ideas or runs out of time before reaching the conclusion.

    Begin by dividing the available time among the major sections.

    Here is an illustrative schedule for a ten-minute presentation:

    SectionSuggested time
    Introduction1 minute
    Main point 12 minutes
    Main point 22 minutes
    Main point 32 minutes
    Conclusion1 minute
    Transitions and pauses2 minutes
    Total10 minutes

    This is a starting point rather than a fixed formula. Your teacher’s requirements and the complexity of the topic should determine the final timing.

    Rehearse with a timer and note which sections take longer than expected. If you consistently exceed the limit, remove less important details rather than speaking too quickly.

    6. Design Clear and Readable Presentation Slides

    Slides should support your explanation, not replace it.

    A common mistake is placing entire paragraphs on every slide and then reading them aloud. This encourages the audience to read ahead instead of listening to the speaker.

    Instead, make each slide focus on one main idea.

    Keep slide text concise

    Use short headings, key phrases, brief explanations, and carefully selected evidence.

    For example, instead of a paragraph describing the benefits of renewable energy, a slide could contain:

    Benefits of Renewable Energy

    • Reduces dependence on fossil fuels
    • Can lower operational emissions
    • Diversifies energy sources
    • Supports energy innovation

    You can explain each point verbally and add evidence where needed.

    Use readable fonts

    Choose a clear, simple font and make sure text is large enough to read from the back of the classroom. A font size around 24 points or larger for main slide text is a useful starting point, although room size and presentation format matter.

    Use headings that are clearly distinguishable from body text. Avoid decorative fonts that make words difficult to recognize.

    Choose colors carefully

    Use strong contrast between text and background. Dark text on a light background or light text on a dark background is often easier to read than combinations with weak contrast.

    Avoid using too many colors. A consistent palette makes the presentation look organized and helps viewers focus on the information.

    Use images, charts, and diagrams purposefully

    Visual aids can explain processes, show comparisons, and make abstract concepts easier to understand.

    Choose visuals that directly support your point. If you include a chart, explain what the audience should notice instead of expecting everyone to interpret it independently.

    Cite images, diagrams, and data when required. Make sure you have permission to use materials when necessary and follow any licensing conditions.

    Avoid unnecessary animations

    Animations and transitions can be useful when they reveal information step by step. However, excessive movement, sound effects, and decorative transitions can distract from your message.

    Use effects only when they serve a clear purpose.

    7. Prepare Speaker Notes Instead of Memorizing Every Word

    Memorizing an entire presentation word for word can make delivery feel rigid. If you forget one sentence, you may struggle to remember what comes next.

    A better approach is to understand your content and prepare brief speaker notes.

    Your notes might include:

    • The key message of each slide.
    • Important facts or figures.
    • Examples you want to explain.
    • Transitions between sections.
    • A reminder of how to conclude the presentation.

    For instance, a slide about solar energy might have the note: “Explain how panels convert sunlight into electricity; mention that output depends on sunlight, panel efficiency, and system design.”

    This reminder gives you a direction without requiring you to read a complete script.

    For difficult definitions or technical material, it can be useful to prepare exact wording. The goal is to know your material well enough to explain it naturally while keeping the presentation accurate.

    8. Practice Your Presentation Out Loud

    Practice is one of the most effective ways to improve delivery and identify problems before presentation day.

    Reading silently is not enough because speaking introduces timing, pronunciation, breathing, and transitions that you may not notice while reading.

    Use this practice routine:

    First rehearsal: Check the content. Present from beginning to end and identify any sections you cannot explain clearly.

    Second rehearsal: Check the timing. Use a timer to see whether you fit the assigned duration.

    Third rehearsal: Check delivery. Focus on volume, pace, pauses, pronunciation, and eye contact.

    Final rehearsal: Simulate the real presentation. Stand up, use your slides, and practice with the notes you intend to use in class.

    If possible, ask a friend or family member to listen. They can tell you which explanations are confusing, which sections are too long, and whether your main message is clear.

    Recording yourself can also help you notice habits such as speaking too quickly, repeating filler words, or looking down at your notes too often.

    9. Manage Nervousness Before Speaking

    Feeling nervous before a class presentation is common. Even students who know their subject well may worry about making mistakes, forgetting their words, or being judged by classmates.

    The goal is not necessarily to eliminate nervousness. It is to manage it well enough to communicate effectively.

    Prepare thoroughly

    Knowing your material reduces uncertainty. When you understand the subject and have rehearsed the structure, it becomes easier to recover if you lose your place.

    Use slow, comfortable breathing

    Before speaking, take a few slow breaths and allow yourself to settle. Avoid forcing unusually deep breaths if they make you feel uncomfortable.

    Arrive early

    If you can, arrive early to check the classroom, test your slides, and confirm that your notes are available. Familiarity with the setup can reduce last-minute stress.

    Focus on the message, not on perfection

    Your audience is there to learn about the topic. You do not need to deliver every sentence flawlessly.

    If you stumble over a word, pause and continue. Most small mistakes are less noticeable to the audience than they feel to the speaker.

    Start at a manageable pace

    Nervous speakers often rush through the opening. Begin with a deliberate pace, complete your first sentence, and give yourself a moment to move into the next point.

    If presentation anxiety regularly prevents you from participating in class, consider speaking with your teacher or a student-support professional about available help.

    10. Use Confident Body Language

    Your body language can support your message by helping you appear attentive, prepared, and engaged.

    You do not need exaggerated gestures or a theatrical speaking style. Natural movement is usually more effective.

    Maintain comfortable eye contact

    Look at different parts of the room instead of focusing entirely on your notes, screen, or one person.

    If direct eye contact makes you uncomfortable, you can briefly look toward different audience members’ faces or the area around their eyes while continuing to speak naturally.

    Stand in a balanced position

    Keep your posture upright and your shoulders relaxed. Avoid repeatedly shifting your weight, turning away from the audience, or hiding behind a desk unless the situation requires it.

    Use natural gestures

    Gestures can emphasize comparisons, describe sizes, or highlight important points. Let them happen naturally instead of planning every movement.

    Avoid distracting habits

    Repeatedly clicking a pen, adjusting your clothes, pacing without purpose, or playing with objects can distract listeners.

    If you tend to fidget, rehearse while standing and keep your hands in a comfortable, relaxed position when you are not gesturing.

    11. Speak Clearly and Maintain a Comfortable Pace

    An effective class presentation depends on how clearly the audience can follow your explanation.

    Speaking too quickly may cause listeners to miss important details. Speaking too slowly without variation can make the presentation difficult to follow.

    Aim for a natural pace that allows the audience to understand unfamiliar concepts.

    Project your voice

    Speak loudly enough for people at the back of the classroom to hear. You do not need to shout; focus on clear articulation and steady volume.

    If you are using a microphone, test it before beginning.

    Pause after important points

    A short pause gives the audience time to process information. It can also help you breathe, collect your thoughts, and move smoothly between sections.

    Explain technical terms

    If your topic includes specialized vocabulary, define important terms before using them repeatedly.

    For example, if you are discussing artificial intelligence, briefly explain what a machine-learning model is before describing its role in a particular application.

    Use transitions

    Transitions connect ideas and show the audience how your presentation is organized.

    Useful phrases include:

    • “Now that we understand the basic concept, let’s look at its main benefits.”
    • “This leads to the next important question.”
    • “The second example shows how this idea works in practice.”
    • “Finally, let’s consider the main takeaway.”

    Use transitions naturally rather than inserting them mechanically after every sentence.

    12. Engage Your Classmates Without Losing Focus

    A presentation is more engaging when the audience has a reason to pay attention.

    You do not need elaborate games or activities. Small, relevant interactions can make your topic easier to understand.

    Start with a question

    A short question can encourage listeners to think about the subject.

    For example, a presentation about digital privacy might begin with: “How many apps on your phone can access some form of personal information?”

    If you use a statistic to answer the question, verify it through a reliable source.

    Use a relatable example

    Examples connect abstract ideas to familiar situations. A presentation about budgeting, for instance, could use a simple student budget to explain income, expenses, and savings.

    Include a brief demonstration

    If the subject allows it, show a process or example rather than explaining everything verbally. A science presentation might demonstrate a safe classroom experiment, while a technology presentation could show how a tool works.

    Follow relevant safety requirements and obtain permission for demonstrations when necessary.

    Invite questions

    If appropriate, ask whether the audience has questions at the end. You can also include a short discussion prompt, provided it fits the assignment.

    Keep audience participation relevant and within the time limit.

    13. How to Answer Questions After Your Presentation

    The question-and-answer section is an opportunity to demonstrate understanding and clarify important points.

    You do not need to know every possible answer. What matters is responding thoughtfully and honestly.

    Follow these steps when answering questions:

    1. Listen carefully. Let the person finish speaking before responding.
    2. Clarify if necessary. If the question is unclear, ask which part they would like you to explain.
    3. Answer directly. Begin with the main point before adding details.
    4. Support your answer. Refer to your research, examples, or evidence when relevant.
    5. Acknowledge uncertainty. If you do not know the answer, say so rather than inventing information.

    You might say, “That’s a useful question. I did not find enough evidence to answer it confidently, but I can explain what the sources I used say about the related issue.”

    This response is more credible than making an unsupported claim.

    If a question challenges your argument, treat it as an opportunity to explain your reasoning. Remain respectful and distinguish between criticism of an idea and criticism of you personally.

    14. Common Class Presentation Mistakes to Avoid

    Even well-prepared students can reduce the effectiveness of their presentations through a few common habits.

    Reading Every Slide Word for Word

    Slides should provide visual support, while your spoken explanation adds meaning and context.

    Better approach: Use short bullet points and speaker notes. Explain the ideas rather than simply repeating the text on the screen.

    Including Too Much Information

    Trying to cover every detail can overwhelm your audience and leave little time for your main arguments.

    Better approach: Prioritize the information that directly supports your objective. Move less important details to your notes or remove them.

    Using Small or Crowded Text

    If the audience cannot read your slides, the visual aids become ineffective.

    Better approach: Simplify each slide, enlarge important text, and use charts or diagrams only when they improve understanding.

    Speaking Too Quickly

    Rushing makes it harder for listeners to follow your reasoning and can make you sound less confident.

    Better approach: Rehearse aloud, pause between key points, and use a timer to check your pace.

    Ignoring the Audience

    Looking only at the screen or notes can make the presentation feel disconnected.

    Better approach: Look up regularly, explain ideas in accessible language, and use relevant examples.

    Using Unverified Information

    Incorrect statistics or unreliable claims can weaken your credibility.

    Better approach: Check facts against original or authoritative sources and acknowledge uncertainty where appropriate.

    Ending Without a Conclusion

    Stopping immediately after the last detail can leave the audience unsure about the main message.

    Better approach: Summarize your key points and finish with a clear closing sentence.

    15. How to Give a Group Class Presentation Successfully

    Group presentations require both individual preparation and coordination among team members.

    Start by dividing the work according to the assignment requirements, each member’s responsibilities, and the time available. Make sure everyone understands the overall argument rather than focusing only on their own section.

    Assign clear responsibilities

    Group members might be responsible for research, slide design, presenting specific sections, managing references, or checking the final presentation.

    However, every member should review the complete material so that the presentation feels connected.

    Agree on one consistent format

    Use the same slide design, heading styles, terminology, and citation format throughout the presentation.

    A shared outline can prevent repeated information and missing topics.

    Practice the transitions

    One of the biggest challenges in group presentations is moving smoothly from one speaker to another.

    Each member should finish with a sentence that connects to the next section. For example, “Now that we have discussed the benefits, Sara will explain the main challenges involved.”

    Balance the speaking time

    Avoid giving one person most of the presentation while others speak for only a few seconds, unless the assignment specifically calls for that arrangement.

    Agree on approximate speaking times and rehearse as a group.

    Prepare for shared questions

    A teacher may direct a question to any group member. Everyone should understand the main findings, the sources used, and the overall conclusion.

    Good coordination helps the group deliver a unified and professional presentation.

    16. A Simple Preparation Timeline for Your Next Presentation

    If you have several days to prepare, use a structured plan to avoid last-minute pressure.

    WhenWhat to do
    4–5 days beforeRead the assignment and research the topic.
    3 days beforeChoose the main message and organize the outline.
    2 days beforeCreate slides and prepare speaker notes.
    1 day beforeRehearse aloud, check timing, and correct weak sections.
    Presentation dayCheck equipment, review key points, and arrive prepared.

    If you have less time, use the same order but shorten the stages. Focus first on understanding the assignment, selecting the essential information, and practicing the complete presentation at least once.

    Frequently Asked Questions About Class Presentations

    How do I give a good class presentation if I am shy?

    Start by preparing a clear outline and practicing aloud in a quiet setting. Then rehearse in front of one trusted person if possible. During the presentation, focus on explaining your main message rather than trying to appear perfectly confident. You can also use brief notes to help you stay organized.

    How do I start a class presentation confidently?

    Begin with a greeting, introduce your topic, explain why it matters, and give a brief overview of the main points. Memorizing your first one or two sentences can help you get started, but the rest of the presentation should be based on understanding your material rather than memorizing every word.

    How many slides should a class presentation have?

    The ideal number depends on the time limit, subject, and amount of explanation required. A short presentation may need only a handful of slides, while a longer presentation may require more. Follow your instructor’s requirements and prioritize readable, useful slides over a fixed number.

    Should I memorize my entire presentation?

    Usually, it is better to understand your content and practice the sequence of ideas than to memorize every sentence. Use brief speaker notes and rehearse transitions. Memorizing a short opening or important definition can be helpful, but a fully memorized script may make recovery more difficult if you forget a line.

    What should I do if I forget what to say during a presentation?

    Pause briefly, look at your notes or the current slide, and return to the main point. You can summarize the idea in simpler words or move to the next section if appropriate. A short pause usually feels longer to the speaker than it does to the audience.

    How can I make my presentation interesting?

    Use clear explanations, relevant examples, useful visuals, and a logical structure. Begin with a question or real-world situation when appropriate. Avoid adding games, animations, or unrelated stories merely to make the presentation entertaining.

    How can I end a class presentation effectively?

    Summarize the most important points, restate the central message, and finish with a clear closing statement. If your assignment allows questions, invite the audience to ask them. Avoid introducing a major new argument in the final moments.

    What should I do if my presentation goes over time?

    Prioritize your central argument and remove less important details. Practice with a timer before presentation day, and avoid spending too long on the introduction. If you are already presenting and realize you are running late, briefly summarize secondary points while preserving your main explanation and conclusion.

    Conclusion

    Learning how to give a class presentation effectively takes preparation, practice, and a willingness to improve. You do not need to be a naturally confident public speaker to communicate your ideas well. A clear message, reliable research, logical organization, readable slides, and thoughtful delivery can make a significant difference.

    Start by understanding the assignment and identifying your main message. Organize your presentation into a focused introduction, a well-supported body, and a concise conclusion. Prepare slides that support your explanation, practice aloud, and develop strategies for managing nervousness and answering questions.

    After each presentation, reflect on what worked and what you would change next time. You might improve your pacing, simplify a complicated slide, or practice transitions more carefully.

    With consistent effort, class presentations can become easier and more rewarding. More importantly, the skills you develop will help you communicate ideas clearly in future academic, professional, and everyday situations.

  • How to Avoid Plagiarism in Academic Writing: A Complete Student Guide

    How to Avoid Plagiarism in Academic Writing: A Complete Student Guide

    Academic writing requires more than presenting good ideas and strong arguments. Students must also show where their information comes from, acknowledge the work of other researchers, and distinguish their own thinking from existing knowledge. This is why learning how to avoid plagiarism in academic writing is essential for students, teachers, researchers, and anyone preparing an academic paper.

    Plagiarism can occur unintentionally when writers forget to cite a source, paraphrase too closely, or misunderstand citation rules. It can also happen when someone deliberately presents another person’s work as their own. Regardless of the reason, plagiarism can undermine academic credibility and lead to serious consequences.

    The good news is that plagiarism is preventable. With careful research habits, accurate citations, effective paraphrasing, and proper note-taking, you can produce original academic work while giving appropriate credit to other people’s contributions.

    In this guide, you will learn what plagiarism means, why it matters, the different forms it can take, and practical steps you can follow to avoid it in essays, research papers, dissertations, and other academic assignments.

    What Is Plagiarism in Academic Writing?

    Plagiarism is presenting another person’s words, ideas, research, creative work, or other intellectual contributions as your own without appropriate acknowledgment.

    It can involve copying text directly, paraphrasing someone else’s argument without a citation, using another person’s research findings without credit, or submitting work that someone else produced.

    Plagiarism is not limited to copying and pasting paragraphs from websites. It can also occur when a student changes a few words in a sentence but keeps the original structure and meaning without acknowledging the source.

    In academic settings, writers are expected to identify borrowed material clearly. Citations allow readers to trace information to its original source and understand how previous research supports the writer’s argument.

    For example, suppose you are writing an essay about online education. You find a research article discussing how digital learning affects student engagement. If you use the article’s findings, you should cite the study even if you explain the findings in your own words.

    The central principle is simple: acknowledge the sources of ideas and information that are not your own, and make your original contributions clear.

    Why Is It Important to Avoid Plagiarism?

    Avoiding plagiarism protects academic integrity and helps ensure that your work represents your own understanding, effort, and analysis.

    1. It Protects Your Academic Reputation

    Universities and educational institutions expect students to submit work that follows academic integrity policies. Plagiarism may result in penalties ranging from a request to revise an assignment to a failing grade or more serious disciplinary action, depending on the institution’s rules and the circumstances.

    Developing honest research and writing habits helps you maintain trust with instructors and academic peers.

    2. It Gives Credit to Original Researchers

    Academic knowledge develops through the work of many people. Citing sources recognizes the contributions of authors, scientists, historians, and other researchers whose findings inform your writing.

    Proper attribution also allows readers to explore the original research and evaluate its relevance.

    3. It Strengthens Your Arguments

    Credible sources provide evidence for your claims. When you acknowledge those sources, readers can verify your information and understand the foundation of your argument.

    A well-supported paper demonstrates not only that you have researched the topic but also that you can assess evidence and explain its significance.

    4. It Develops Independent Thinking

    Academic writing should involve more than collecting quotations and repeating other people’s ideas. It requires you to compare evidence, recognize patterns, evaluate arguments, and develop your own conclusions.

    When you use sources responsibly, you learn how to build an original argument informed by existing knowledge.

    5. It Builds Professional Research Skills

    The ability to attribute sources accurately is valuable beyond school and university. Researchers, journalists, analysts, and professionals often need to summarize information, prepare reports, and use other people’s work responsibly.

    Learning these habits early helps prepare you for more advanced academic and professional tasks.

    Common Types of Plagiarism Students Should Know

    Understanding the different forms of plagiarism makes it easier to recognize and prevent mistakes.

    Direct Plagiarism

    Direct plagiarism occurs when someone copies another person’s words without quotation marks or appropriate attribution.

    For example, copying a paragraph from an online article into an assignment and presenting it as original writing is direct plagiarism.

    How to avoid it: Use quotation marks for short verbatim quotations, follow the required block-quotation format for longer passages, and provide the citation required by your style guide. When possible, summarize the idea in your own words and cite the source instead.

    Paraphrasing Plagiarism

    Paraphrasing plagiarism occurs when a writer uses another person’s ideas but fails to acknowledge the source. It may also occur when the writer changes only a few words while retaining the source’s original sentence structure.

    Changing individual words does not make someone else’s argument your own.

    How to avoid it: Read and understand the source, set it aside, explain the idea independently, and cite the original work. Compare your version with the source to make sure the wording and sentence structure are genuinely your own.

    Mosaic or Patchwork Plagiarism

    Mosaic plagiarism involves combining phrases, sentences, or ideas from one or more sources without adequate attribution. A writer might copy short fragments from several webpages and connect them with a few original words.

    Although the finished paragraph may look different from any single source, it still relies improperly on borrowed material.

    How to avoid it: Take notes in your own words, mark direct quotations clearly, track every source, and build paragraphs around your own explanation rather than stitching together copied phrases.

    Self-Plagiarism

    Self-plagiarism generally refers to reusing your previously submitted or published work without appropriate disclosure or permission when the academic context requires original work.

    For example, submitting the same essay for two different courses without approval may violate an institution’s academic integrity policy.

    How to avoid it: Check your instructor’s rules before reusing earlier work. If reuse is permitted, disclose it and cite your previous publication or assignment when appropriate.

    Accidental Plagiarism

    Accidental plagiarism occurs when a writer unintentionally fails to acknowledge a source or incorrectly paraphrases borrowed information.

    Common causes include rushed writing, incomplete research notes, forgotten citations, and confusion about what counts as common knowledge.

    Even when the mistake is unintentional, it may still need to be addressed under the institution’s academic integrity policy.

    How to avoid it: Keep a complete source list from the beginning of your research, insert citation reminders while drafting, and review every paragraph before submission.

    Source-Based Plagiarism

    Source-based plagiarism can involve misrepresenting sources, citing material that does not support a claim, or inventing references. It may also involve relying on a secondary source while suggesting that you consulted the original research.

    How to avoid it: Open and verify your sources, make sure each reference supports the statement attached to it, and clearly identify secondary citations when you have not consulted the original work.

    10 Practical Ways to Avoid Plagiarism in Academic Writing

    The most effective way to prevent plagiarism is to build good habits into every stage of the writing process. The following steps can help you work more confidently and accurately.

    1. Start Your Research Early

    Time pressure is a common reason students make avoidable citation mistakes. When a deadline is close, it can be tempting to copy text into a draft and plan to fix the references later.

    Starting early gives you time to understand the topic, compare sources, organize your notes, and check your citations.

    Create a simple writing schedule that includes separate time for research, outlining, drafting, referencing, and proofreading. A manageable schedule can reduce last-minute errors.

    2. Record Source Details Immediately

    Whenever you find a useful source, save its bibliographic information before taking detailed notes.

    Depending on the source type and citation style, you may need:

    • Author or organization name
    • Publication year or date
    • Title of the book, article, report, or webpage
    • Journal title, volume, issue, and page range, where applicable
    • Publisher information, where applicable
    • DOI or URL
    • Page or section number for a quotation or specific passage

    Recording these details early helps prevent incomplete references and makes it easier to return to the original material.

    3. Learn How to Paraphrase Properly

    Paraphrasing is an essential academic writing skill. It allows you to explain a source’s ideas in language that fits your argument while preserving the original meaning.

    A reliable paraphrasing process involves four steps:

    1. Read the passage until you understand the idea.
    2. Look away from the original text.
    3. Write the idea using your own sentence structure and vocabulary.
    4. Compare your version with the source to check accuracy, then add the appropriate citation.

    Example

    Original sentence:

    “Regular feedback helps learners identify gaps in their understanding and adjust their study strategies.”

    Weak paraphrase:

    “Frequent feedback helps students identify gaps in their understanding and change their study strategies.”

    This version changes only a few words and closely follows the original structure.

    Stronger paraphrase:

    “Students can use feedback to recognize concepts they have not mastered and decide how to improve their approach to studying (Author, Year).”

    The citation shown here is a placeholder. Replace it with the correct citation for the source you actually consulted.

    A strong paraphrase expresses the source’s meaning accurately without copying its distinctive wording or sentence structure. It still requires a citation because the underlying idea belongs to the source.

    4. Use Direct Quotations Selectively

    Direct quotations are useful when an author’s exact wording is important, such as when analyzing a definition, interpreting a statement, or discussing a distinctive argument.

    However, a paper filled with quotations may not demonstrate enough independent analysis.

    When quoting a source:

    • Reproduce the words accurately.
    • Use quotation marks or the appropriate block-quotation format.
    • Provide the citation required by your style.
    • Include a page number or another locator when required and available.
    • Explain how the quotation supports your argument.

    Avoid inserting quotations without context. Introduce the relevant idea, present the quotation, and explain its significance.

    5. Understand the Citation Style Required for Your Assignment

    Different academic disciplines use different referencing systems. Common examples include APA, MLA, Chicago, Harvard, and IEEE.

    These styles differ in how they format in-text citations, footnotes, and reference lists. For example, APA commonly uses author-date citations, MLA generally uses author-page citations, and IEEE typically uses numbered citations.

    Before drafting, check your assignment instructions and use the required style consistently. If you are unsure which style applies, ask your instructor.

    For additional guidance, read our article on academic citation styles explained.

    6. Distinguish Your Ideas From Source Material

    One of the easiest ways to lose track of attribution is to mix personal thoughts with copied passages in your research notes.

    Use clear labels to distinguish between:

    • Your own observations and interpretations
    • Paraphrased notes from a source
    • Exact quotations
    • Questions or ideas to investigate further

    For example, mark a quotation with quotation marks and include the page number immediately. Label paraphrased notes with the author’s name and year.

    When you return to these notes during drafting, you will be less likely to mistake a source’s language for your own.

    7. Cite Statistics, Data, and Research Findings

    Students often remember to cite quotations but overlook numerical information, survey findings, research results, and specialized claims.

    If a statistic or finding comes from a particular report, dataset, or research paper, provide an appropriate citation.

    For example, if you use an enrollment figure from an official education report, cite the report rather than presenting the number without context.

    Check the original source to confirm that you have interpreted the data correctly. Also verify the date, population, units, and limitations of the finding when those details affect your argument.

    8. Use Reliable Citation Management Tools

    Reference-management tools can help organize research and create citations. They are especially useful for longer assignments involving many books, articles, and reports.

    Common options include:

    • Zotero: Collects and organizes references and can generate citations and bibliographies.
    • Mendeley Reference Manager: Helps manage research references and related documents.
    • EndNote: Provides reference-management features for academic research.
    • Word processor citation tools: Applications such as Microsoft Word include features for inserting citations and generating reference lists.

    These tools can save time, but their output is not always perfect. Imported metadata may be incomplete, and automatic formatting can require corrections.

    Always verify the source information and check the generated reference against the required citation guide.

    9. Check Your Work With Plagiarism-Detection Software

    Plagiarism-detection tools compare submitted writing with material in their available databases and sources. Depending on the tool, a report may highlight matching phrases or provide a similarity percentage.

    These tools can help identify passages that need review, but a similarity score is not the same as a definitive plagiarism judgment.

    A high score may include correctly cited quotations, standard phrases, or reference entries. A low score does not guarantee that every idea has been attributed correctly, particularly if the source is absent from the tool’s database.

    Use a similarity report as a starting point for review. Check the highlighted passages, verify citations, and revise any text that is too close to the original without appropriate quotation or attribution.

    Before uploading an assignment, also consider your institution’s rules and the privacy terms of any third-party service.

    10. Proofread the Paper Before Submission

    The final review is an important opportunity to catch missing citations, incorrect references, and accidental copying.

    Read your work paragraph by paragraph and ask:

    • Does this paragraph contain information from a source?
    • Have I cited borrowed ideas, data, and quotations?
    • Is the paraphrasing sufficiently independent from the original wording?
    • Does the citation support the claim I am making?
    • Is the complete reference included in the required list?
    • Have I followed the required citation style consistently?

    Reviewing the paper in this structured way is more reliable than checking citations only at the end.

    What Counts as Common Knowledge?

    Common knowledge is information that is widely known and accepted within a relevant audience or field. Such information generally does not require a citation.

    For example, a basic fact such as “Water freezes at approximately 0°C under standard atmospheric pressure” may be considered common knowledge in many educational contexts.

    However, the status of a fact depends on the audience and subject. A detailed scientific explanation, a recent research finding, a contested historical interpretation, or a specific statistic will generally require a source.

    When you are uncertain, consider these questions:

    • Is this information widely known by my intended audience?
    • Is the claim specific, technical, disputed, or dependent on research?
    • Did I learn this information from a particular source?
    • Would a reader reasonably expect evidence for this statement?

    If a claim is specialized or could be challenged, citing a credible source is usually the safer choice.

    How to Avoid Plagiarism When Using AI Writing Tools

    AI writing tools can assist with brainstorming, outlining, explaining difficult concepts, and improving clarity. However, using them does not remove your responsibility to produce honest academic work.

    Policies differ across institutions and assignments, so always check the rules before using AI-generated material.

    Follow these principles when AI tools are permitted:

    Verify All Facts and References

    AI systems can generate inaccurate claims, misrepresent research, or provide references that do not exist. Open the original publication and confirm the title, author, date, DOI, and relevant findings before including a source in your paper.

    Never cite a publication solely because an AI tool suggested it.

    Do Not Present Unpermitted AI Work as Your Own

    Some assignments permit AI assistance for planning or language feedback but prohibit generated text in the submitted work. Others allow broader use with disclosure.

    Follow the specific rules of your institution and assignment. If disclosure is required, explain your use of AI in the format your instructor requests.

    Use AI to Support Learning, Not Replace It

    You can use permitted tools to clarify concepts, develop research questions, or identify areas that need further investigation. Your final work should reflect your own understanding and comply with the assignment’s authorship requirements.

    Protect Confidential and Sensitive Information

    Do not upload private research data, unpublished material, personal information, or confidential documents to an external tool unless you have the necessary permission and understand the relevant privacy terms.

    Keep a Record of Your Research Process

    Save your source notes, drafts, and relevant references. A clear research process can help you verify the origin of claims and explain how you developed your argument if questions arise.

    AI assistance and plagiarism are not identical issues. Even if generated text does not match an existing publication, submitting it may still violate an assignment’s rules about authorship or permitted assistance.

    What Is a Plagiarism Checker, and How Should You Use One?

    A plagiarism checker is a tool that compares text against a collection of available sources and identifies similarities. Some systems also compare documents against institutional repositories or previously submitted assignments.

    These tools are useful for reviewing academic writing, but they have limitations.

    What a Similarity Report Can Tell You

    A report may help you locate:

    • Text that closely matches published sources
    • Quotations that may need quotation marks
    • Passages that lack clear attribution
    • References or standard phrases contributing to the similarity score
    • Repeated wording that could be paraphrased more effectively

    What a Similarity Report Cannot Prove by Itself

    A similarity percentage does not automatically establish whether plagiarism has occurred. The meaning of a match depends on its context.

    A correctly quoted and cited passage may appear as a match. Conversely, a paraphrased idea may require a citation even if the wording is different enough not to trigger a similarity alert.

    Review the actual matches rather than aiming for an arbitrary percentage. Follow your institution’s rules, and do not try to hide copied material by changing a few words or manipulating the formatting.

    How to Fix Accidental Plagiarism in a Draft

    If you discover a citation problem before submitting your paper, take time to correct it.

    Step 1: Identify the source. Find the original publication, webpage, or document containing the borrowed information.

    Step 2: Decide whether the wording is copied or paraphrased. If you used the exact words, format them as a quotation when appropriate. If you paraphrased, rewrite the passage independently while preserving its meaning.

    Step 3: Add the correct citation. Follow your assignment’s citation style and include the required locator, where applicable.

    Step 4: Check the reference list. Make sure the source’s complete reference is included and that its details are accurate.

    Step 5: Review the surrounding paragraph. Confirm that the borrowed information is clearly distinguished from your own analysis and that the citation supports the claim.

    If you discover a possible plagiarism issue after submission, consult your instructor or the appropriate academic office promptly and follow your institution’s procedures.

    A Practical Anti-Plagiarism Checklist for Students

    Use this checklist before submitting an essay, report, dissertation, or research paper.

    • I understand and have followed my assignment’s academic integrity policy.
    • I have cited the sources of borrowed ideas, evidence, statistics, and arguments.
    • I have used quotation marks or block quotations for copied wording.
    • I have paraphrased source material using my own wording and sentence structure.
    • I have cited paraphrases and summaries where required.
    • I have recorded complete details for each source.
    • Every in-text citation matches the appropriate reference entry.
    • I have checked that each source supports the claim associated with it.
    • I have verified references generated by citation tools or AI systems.
    • I have used plagiarism-detection reports thoughtfully, if available.
    • I have followed the rules for any permitted AI assistance.
    • I have reviewed the final document for citation errors.

    Completing this checklist will not replace your institution’s formal requirements, but it can help you catch common problems before submission.

    Frequently Asked Questions About Avoiding Plagiarism

    What is the easiest way to avoid plagiarism?

    The most effective approach is to keep accurate source notes, write in your own words, cite borrowed ideas and information, and verify your references before submitting your work. Building these habits into the research process is easier than trying to fix missing citations at the last minute.

    Does paraphrasing prevent plagiarism?

    Paraphrasing can help you express an idea in your own words, but it does not remove the need to cite the original source. A proper paraphrase changes the wording and sentence structure while preserving the meaning, and it includes the citation required by your style guide.

    Do I need to cite information if I change the wording?

    Yes, if the idea, argument, research finding, or information comes from another source. Changing the wording does not make the underlying contribution your own. Cite the source even when you have paraphrased it successfully.

    Can plagiarism happen accidentally?

    Yes. Writers may unintentionally omit citations, paraphrase too closely, or lose track of the sources used in their notes. Although the mistake may be unintentional, it can still violate academic integrity rules. Careful documentation and proofreading help prevent these problems.

    Is using a plagiarism checker enough to prove my paper is original?

    No. A plagiarism checker can identify similarities with the material available to it, but it cannot reliably determine every case of plagiarism. Some uncited ideas may not trigger a match, while properly cited quotations may contribute to a similarity score. You must review the paper and its citations yourself.

    Can I reuse my own work without citing it?

    That depends on the assignment and institution’s rules. Reusing previously submitted or published material without disclosure may be considered self-plagiarism or may violate course requirements. Ask your instructor for permission and follow any applicable citation or disclosure rules.

    Is using AI considered plagiarism?

    Not automatically. The answer depends on how AI is used and what the assignment permits. Submitting AI-generated material as your own may violate authorship or academic integrity policies, even if it is not copied from an identifiable source. Follow your institution’s AI rules and disclose assistance when required.

    How can I cite a website correctly?

    Identify the author or organization, the webpage title, the publication or update date if available, the website name where required, and the URL. The exact format depends on the citation style and source type. Verify the information on the original page and consult the relevant style guide.

    What should I do if I am accused of plagiarism?

    Read your institution’s academic integrity policy and follow the formal process. Review the specific passages and sources involved, gather your drafts and research notes, and provide an accurate explanation of your work. If you made a mistake, be honest about it and follow the institution’s guidance.

    Conclusion

    Learning how to avoid plagiarism in academic writing is an essential part of becoming a responsible and effective student. Plagiarism can involve copied wording, poorly paraphrased ideas, missing citations, inappropriate reuse of previous work, or inaccurate references. Fortunately, most common problems can be prevented through careful research and consistent writing habits.

    Start by recording source details as you research. Learn to paraphrase accurately, use direct quotations appropriately, and apply the citation style required by your institution. Check your references carefully, use plagiarism-detection tools as a review aid rather than a final judgment, and follow your assignment’s rules for AI assistance.

    Most importantly, remember that academic integrity is not just about avoiding penalties. It is about respecting other people’s contributions, supporting your arguments with verifiable evidence, and showing what you have learned through your own analysis.

    With these habits in place, you can write more confidently, present your research responsibly, and build a strong foundation for future academic work.

  • A Beginner’s Guide to Understanding Academic Citations

    A Beginner’s Guide to Understanding Academic Citations

    Academic citations are an essential part of writing essays, research papers, reports, and dissertations. They help readers identify the original sources of information, verify facts, and understand how an argument has been developed. However, beginners often find academic citation styles confusing because different schools, universities, and academic disciplines follow different formatting rules.

    Understanding academic citation styles explained in a simple way can help students avoid plagiarism, organize research more effectively, and produce professional academic work. Whether you are writing your first college essay or preparing a university research paper, learning how citations work is a valuable academic skill.

    This beginner-friendly guide explains the main academic citation styles, their differences, when to use each one, and how to cite books, journal articles, websites, and other sources correctly.

    What Are Academic Citations?

    An academic citation is a reference that identifies the source of information, ideas, evidence, or quotations used in a piece of writing. Citations acknowledge the original creator and allow readers to locate the source if they want to learn more.

    For example, when you use a statistic from a research article, summarize an author’s argument, or quote a passage from a book, you generally need to cite the source.

    Most academic citation systems contain two main elements:

    • In-text citations: Short references placed within the body of your writing to indicate where information came from.
    • Reference list or bibliography: A detailed list of sources, usually placed at the end of the paper.

    The exact format depends on the citation style you are required to use. Some styles emphasize the author’s name and publication year, while others use footnotes or numbered references.

    Why Are Citation Styles Important?

    Using the correct academic citation style does more than satisfy formatting requirements. It supports academic integrity and makes your work easier to evaluate.

    1. They Help Prevent Plagiarism

    Plagiarism occurs when someone presents another person’s words, ideas, or work as their own without appropriate acknowledgment. Citing sources makes it clear which ideas came from other researchers and which conclusions are your own.

    Remember that changing a few words in a source does not automatically make the idea your own. Paraphrased information usually needs a citation too.

    2. They Make Research Verifiable

    Readers and instructors may want to check the evidence behind your claims. Complete citations provide details such as an author’s name, publication date, article title, journal, page range, or DOI.

    These details help readers locate the original material and assess its reliability.

    3. They Strengthen Academic Arguments

    Research becomes more persuasive when claims are supported by credible evidence. Citations demonstrate that your work engages with relevant scholarship instead of relying only on personal opinions.

    4. They Create Consistency

    Citation styles establish standard rules for presenting research. Consistent formatting makes academic papers easier to read and helps readers find important source information quickly.

    5. They Respect Intellectual Property

    Researchers, authors, and other creators contribute time and expertise to their work. Proper attribution recognizes those contributions and gives credit to the people responsible for the original ideas.

    What Are the Main Academic Citation Styles?

    Several citation styles are widely used in schools, colleges, universities, and research publications. Each has its own rules for in-text citations, footnotes, and reference lists.

    The five styles beginners are most likely to encounter are APA, MLA, Chicago, Harvard, and IEEE.

    1. APA Style

    The American Psychological Association (APA) style is commonly used in psychology, education, behavioral sciences, and many social science subjects.

    APA generally uses an author-date system. An in-text citation includes the author’s surname and the publication year.

    Example of an in-text citation:

    (Johnson, 2023)

    A direct quotation typically includes a page number when one is available:

    (Johnson, 2023, p. 42)

    A basic reference-list entry for a book may look like this:

    Johnson, R. (2023). Understanding human behavior. Academic Press.

    This is an illustrative example rather than a real publication.

    APA’s reference list is arranged alphabetically by the authors’ surnames. The current standard is APA 7th edition, although you should always follow the edition specified by your instructor or publication.

    When to use APA: Psychology, education, social sciences, and other disciplines that follow APA requirements.

    2. MLA Style

    The Modern Language Association (MLA) style is widely used in literature, language studies, cultural studies, and other humanities disciplines.

    MLA generally uses an author-page system. In-text citations include the author’s surname and the relevant page number when available.

    Example of an in-text citation:

    (Johnson 42)

    A basic Works Cited entry for a book may look like this:

    Johnson, Robert. Understanding Human Behavior. Academic Press, 2023.

    This is an illustrative example.

    MLA emphasizes the relationship between the source and the specific information being discussed. Its Works Cited list is generally arranged alphabetically by the authors’ surnames.

    The current widely used edition is MLA 9th edition.

    When to use MLA: Literature, language, literary analysis, and many humanities assignments.

    3. Chicago Style

    The Chicago Manual of Style offers two major documentation systems:

    • Notes and bibliography: Uses footnotes or endnotes, usually accompanied by a bibliography. It is common in history and some humanities disciplines.
    • Author-date: Uses parenthetical author-date citations and a reference list. It is often used in the sciences and social sciences when Chicago is required.

    A simplified Chicago notes-and-bibliography footnote for a book might look like this:

    1. Robert Johnson, Understanding Human Behavior (New York: Academic Press, 2023), 42.

    A simplified bibliography entry might look like this:

    Johnson, Robert. Understanding Human Behavior. New York: Academic Press, 2023.

    These are illustrative examples; punctuation and formatting can vary according to the source type and the applicable edition.

    Chicago is particularly useful when a paper relies heavily on historical documents, archival material, or detailed source notes.

    When to use Chicago: History, some humanities fields, and publications that specifically request Chicago documentation.

    4. Harvard Style

    Harvard referencing is an author-date citation system commonly used in universities, particularly in the United Kingdom and other academic settings. Unlike APA and MLA, Harvard does not have one universally controlling manual used by every institution. Universities may publish their own versions of its rules.

    Example of an in-text citation:

    (Johnson, 2023, p. 42)

    A simplified reference-list entry for a book might look like this:

    Johnson, R. (2023) Understanding human behavior. Academic Press.

    The reference list is usually arranged alphabetically by author. Depending on the university’s guidelines, details such as punctuation, capitalization, publisher location, and access dates may differ.

    When to use Harvard: Assignments and research projects where the institution or instructor specifically requests Harvard referencing.

    5. IEEE Style

    The Institute of Electrical and Electronics Engineers (IEEE) style is frequently used in engineering, computer science, electronics, and technology-related research.

    IEEE generally uses numbered citations in square brackets. Sources receive numbers according to the order in which they are first cited in the text.

    Example of an in-text citation:

    Recent research examines this problem in detail [1].

    A simplified reference-list entry for a book might look like this:

    [1] R. Johnson, Understanding Human Behavior. Academic Press, 2023.

    This is an illustrative example.

    Unlike author-date systems, IEEE allows readers to identify a source by its number in the text and consult the corresponding numbered entry in the reference list.

    When to use IEEE: Engineering, computer science, electronics, and technical publications that follow IEEE guidelines.

    APA vs. MLA vs. Chicago vs. Harvard vs. IEEE

    Choosing a citation style becomes easier when you compare the systems side by side.

    Citation styleCommon subject areasIn-text citation systemSource list
    APAPsychology, education, social sciencesAuthor and yearReferences
    MLALiterature, language, humanitiesAuthor and pageWorks Cited
    ChicagoHistory, humanities, some social sciencesFootnotes/endnotes or author-dateBibliography or reference list
    HarvardVarious academic subjectsAuthor and yearReference list
    IEEEEngineering, computing, technologyNumbered citationsNumbered references

    These are common patterns rather than universal rules. A journal, department, or instructor may require a specific variation.

    The most important point is that you should not choose a citation style simply because it looks easier. Use the system required by your assignment, institution, or intended publication.

    How to Choose the Right Academic Citation Style

    If you are unsure which citation style to use, follow these steps.

    Step 1: Read Your Assignment Instructions

    Start by checking the assignment brief, course handbook, or research guidelines. Instructors often specify a style such as APA 7, MLA 9, Chicago, Harvard, or IEEE.

    If the instructions do not mention a style, ask your instructor before formatting the entire paper.

    Step 2: Consider Your Academic Discipline

    Different fields have developed conventions that suit their research practices.

    For example, APA’s author-date system makes publication dates easy to identify, which is useful in fields where research currency matters. MLA’s author-page system is helpful when analyzing particular passages in literary texts. Chicago’s notes-and-bibliography system can accommodate detailed historical source information.

    These conventions are useful guides, but your institution’s requirements take priority.

    Step 3: Check the Required Edition or Guide

    Citation rules can change between editions. Small differences may affect capitalization, DOI presentation, publisher information, or the formatting of electronic sources.

    Use the edition required by your instructor or journal rather than relying on an outdated online example.

    Step 4: Identify the Types of Sources You Are Using

    Think about whether your paper relies on books, journal articles, websites, reports, interviews, datasets, or legal materials.

    Check how your required style handles each source type. Some sources require additional details, and not every source can be formatted using a simple book or website template.

    Step 5: Stay Consistent

    Once you have selected the required style, apply it consistently throughout your paper. Avoid mixing APA in-text citations with an MLA Works Cited list or using different punctuation rules without a valid reason.

    Consistency makes your paper look more professional and helps readers follow your evidence.

    How to Cite Different Types of Sources

    The information needed for a citation depends on the type of source. Below are beginner-friendly examples of common source categories.

    How to Cite a Book

    A book citation generally includes the author’s name, title, publication year, and publisher. The order and punctuation vary by style.

    For example, an APA-style book reference generally follows this pattern:

    Author, A. A. (Year). Title of the book. Publisher.

    Before submitting your paper, verify the author, title, publication year, and publisher against the actual book.

    How to Cite a Journal Article

    Academic journal articles commonly require:

    • Author or authors
    • Publication year
    • Article title
    • Journal title
    • Volume and issue numbers, where applicable
    • Page range or article number, where applicable
    • DOI, if available

    In APA, a typical journal reference follows this general structure:

    Author, A. A. (Year). Title of the article. Title of Journal, volume(issue), page range. DOI

    The DOI should be included in the format prescribed by the required style. A DOI is generally preferable to a temporary database link when one exists.

    How to Cite a Website

    Online sources may include educational resources, government publications, news articles, organizational reports, and webpages.

    Depending on the citation style and the type of webpage, you may need the author’s name, publication or update date, webpage title, website name, and URL.

    For a webpage without a clearly identified individual author, the organization may be treated as the author when appropriate. If no publication date is available, follow your citation style’s instructions rather than inventing one.

    You should also check whether the page is credible and suitable for academic use. Not every webpage is an appropriate source for a research paper.

    How to Cite a Chapter in an Edited Book

    A chapter in an edited book is not always cited like an entire book. You may need the chapter author’s name, chapter title, editor details, book title, page range, publisher, and publication year.

    This distinction matters because the chapter author and the book editor may be different people.

    How to Cite a Direct Quote

    When you reproduce another author’s exact words, use quotation marks or the block-quotation format required by your style. Add the appropriate citation and locator, such as a page number, when required and available.

    For example, an APA-style parenthetical citation for a quotation from a paginated source may look like this:

    (Johnson, 2023, p. 42)

    For sources without page numbers, consult the style guide for alternatives, such as paragraph numbers or section headings where appropriate.

    How to Cite a Paraphrase

    Paraphrasing means expressing a source’s ideas in your own words and sentence structure. A paraphrase still requires a citation because the underlying idea comes from someone else.

    For example:

    Original idea: Regular practice can help learners retain information over time.

    Paraphrase: Students may remember material more effectively when they review and practice it repeatedly.

    Even though the wording has changed, the source should still be acknowledged if that idea comes from a particular author.

    In-Text Citations vs. Reference Lists

    One common beginner mistake is confusing an in-text citation with a complete reference.

    An in-text citation provides a short indication of the source within the paper. A reference-list entry gives readers the information needed to locate the full source.

    For example, in an author-date style, the paper might contain:

    (Johnson, 2023)

    The corresponding reference-list entry provides the full publication details.

    In numbered systems such as IEEE, the in-text citation might instead appear as [1], linking to the first entry in the numbered reference list.

    In general, every source cited in the text should have a corresponding full entry when the chosen style requires one. Similarly, sources listed in a reference list should normally be cited in the paper unless the required system uses a broader bibliography that includes works consulted but not directly cited.

    Common Citation Mistakes Students Should Avoid

    Even students who understand the basics can make citation errors. Paying attention to the following problems can improve the accuracy of your work.

    1. Mixing Different Citation Styles

    Using one style for in-text citations and another for the reference list creates inconsistency. Follow one required system throughout the paper.

    2. Forgetting to Cite Paraphrased Ideas

    Citations are not needed only for direct quotations. Summaries, paraphrases, statistics, and borrowed arguments generally need appropriate acknowledgment too.

    3. Leaving Out Important Source Details

    Missing authors, publication dates, page numbers, journal details, or DOIs can make a reference difficult to verify. Check the original source instead of guessing.

    4. Using Unreliable Citation Generators Without Checking the Results

    Citation tools can save time, but they may misread metadata, select the wrong source type, or apply outdated formatting rules.

    Always compare automatically generated citations with the official style guide and the information on the source itself.

    5. Treating Every Online Source as Equally Credible

    A properly formatted citation does not automatically make a source reliable. Consider the author’s expertise, the publisher, the evidence presented, the publication date, and whether the source is appropriate for your research question.

    6. Forgetting to Update References After Editing

    When you remove a paragraph, change an argument, or add a source, review your in-text citations and reference list again. Make sure that the citations still match the sources actually used.

    7. Citing a Source You Have Not Verified

    Whenever possible, consult the original article, book, report, or webpage rather than relying on another writer’s description of it. If you must cite a secondary source, follow your citation style’s rules for secondary citations.

    Useful Tools for Managing Academic Citations

    Reference-management tools can help students organize sources, insert citations, and create reference lists. They are particularly useful for longer research projects with many sources.

    Common options include:

    • Zotero: Helps collect, organize, and cite research materials.
    • Mendeley Reference Manager: Supports reference organization and research workflows.
    • EndNote: Offers reference-management features often used in academic research.
    • Built-in word processor tools: Microsoft Word and other writing applications may offer citation and bibliography features.

    Each tool has different features and workflows. Check whether it supports your required citation style and whether its output matches the latest applicable guidelines.

    Citation generators and AI writing tools can assist with formatting, but they should not replace source verification. Confirm that every author, title, date, DOI, and URL is accurate before submitting your work.

    A Simple Citation Checklist Before Submission

    Use this checklist when reviewing an essay, report, or research paper.

    • I followed the citation style specified by my instructor or institution.
    • I used the correct edition or institutional guide.
    • I cited borrowed ideas, quotations, statistics, and paraphrases.
    • My direct quotations follow the required quotation and locator rules.
    • Every in-text citation matches the appropriate source entry.
    • My reference list or bibliography follows the correct formatting rules.
    • Author names, titles, dates, page ranges, and DOIs are accurate.
    • My sources are relevant, credible, and suitable for the assignment.
    • I checked any citations generated automatically by software.
    • I reviewed the final paper for consistency after editing.

    A final citation check can catch small errors before they affect the quality of your academic submission.

    Frequently Asked Questions About Academic Citation Styles

    What is the easiest academic citation style for beginners?

    There is no single easiest style for everyone. APA and Harvard can feel straightforward because they commonly use author-date citations, while MLA uses a simple author-page approach. Chicago notes-and-bibliography and IEEE may take some getting used to because they use footnotes or numbered references. The best choice is the style your assignment requires.

    What is the difference between APA and MLA?

    APA generally uses the author’s surname and publication year in in-text citations, while MLA generally uses the author’s surname and page number when available. APA is common in psychology and social sciences; MLA is common in literature and humanities. Their reference-list names and formatting rules also differ.

    Is Harvard referencing the same as APA?

    No. Both commonly use author-date citations, but their rules for reference entries, punctuation, capitalization, and source details can differ. Harvard referencing also varies across institutions, so students should follow their university’s specific guide.

    Do all academic sources need citations?

    Sources used to support borrowed ideas, arguments, quotations, statistics, and other non-original information generally need citations. Common knowledge may not require a citation, but what counts as common knowledge depends on the audience and subject. When uncertain, consult your instructor or cite a credible source.

    Do I need to cite a source if I paraphrase it?

    Yes. Paraphrasing changes the wording but does not make the original idea your own. Cite the source according to your required citation style, even when you do not use a direct quotation.

    Can I use an online citation generator?

    Yes, citation generators can help create initial references quickly. However, they can contain errors or incomplete information. Verify every generated citation against the original source and the official guidelines for your required style.

    What is the difference between a reference list and a bibliography?

    A reference list generally includes sources cited directly in the paper. A bibliography may include cited sources as well as additional works consulted during research, depending on the citation system and assignment. Follow your instructor’s definition and formatting requirements.

    What should I do if a source has no author or publication date?

    Do not invent missing information. Follow the rules of your required citation style for sources without named authors or dates. Depending on the source, an organization may be the author, or the title may occupy the author’s position. Date formatting also varies by style.

    Which citation style should I use for a university assignment?

    Check your assignment instructions, department handbook, or university referencing guide first. If the required style is unclear, ask your instructor. Do not assume that one style is accepted for every subject or institution.

    Conclusion

    Understanding academic citation styles is an important step toward becoming a confident academic writer. APA, MLA, Chicago, Harvard, and IEEE each provide a structured way to acknowledge sources, but they differ in their in-text citation systems and reference formatting.

    To cite sources accurately, begin by identifying the style your instructor requires, use the correct edition or institutional guide, and keep your citations consistent. Reference-management tools can make the process easier, but always verify the details against the original sources.

    By learning the fundamentals of academic citation and avoiding common formatting mistakes, you can strengthen your research, support your arguments, and demonstrate academic integrity in every paper you write.

    Remember: Accurate citations are not just a formatting requirement. They help readers trace your evidence, recognize original contributions, and trust the research behind your work.

  • How to Write a Lab Report for School or University

    How to Write a Lab Report for School or University

    Writing a lab report is an essential academic skill for students studying science, biology, chemistry, physics, engineering, and other practical subjects. A well-written report explains what you investigated, why you conducted the experiment, how you collected data, and what your results reveal. It also demonstrates your ability to analyze evidence and communicate scientific findings clearly.

    However, many students find it challenging to organize their observations, describe experimental procedures, present results, and draw conclusions from data. A report may contain accurate information but still lose marks if its structure is unclear or its conclusions are not supported by evidence.

    Learning how to write a lab report can make practical assignments easier to manage and help you present your scientific work professionally. The process becomes much simpler when you understand the purpose of each section and know what information belongs in it.

    In this guide, you will learn the main parts of a lab report, how to write each section step by step, common mistakes to avoid, and practical tips for producing a clear and accurate scientific report.

    What Is a Lab Report?

    A lab report is a structured document that describes a scientific experiment or practical investigation. It records the purpose of the experiment, the methods used, the observations collected, and the conclusions drawn from the evidence.

    Lab reports help students demonstrate that they understand the scientific concepts behind an experiment and can interpret its results. They also provide a record that allows readers to understand what was done and, when appropriate, repeat the procedure.

    Depending on the course, a lab report may be a short worksheet, a formal scientific paper, or a detailed technical document. The expected format varies between schools, colleges, universities, and scientific disciplines.

    A typical lab report includes the following sections:

    • Title
    • Abstract, when required
    • Introduction and objectives
    • Materials and methods
    • Results
    • Discussion
    • Conclusion
    • References
    • Appendices, when necessary

    Always check your instructor’s guidelines before writing. If a required template differs from the structure described here, follow the instructions for your specific assignment.

    Why Is Learning to Write a Lab Report Important?

    Lab reports develop several skills that students need throughout their academic and professional lives.

    Scientific communication: You learn to explain an investigation clearly, using appropriate terminology and an organized structure.

    Data analysis: You practice interpreting measurements, identifying patterns, and evaluating whether your findings support a hypothesis.

    Critical thinking: You learn to consider alternative explanations, recognize limitations, and distinguish evidence from assumptions.

    Accuracy and reproducibility: Recording methods and measurements carefully helps others understand how an experiment was performed.

    Academic writing: You gain experience writing concise explanations, presenting evidence, citing sources, and following formal reporting conventions.

    These skills are useful beyond laboratory classes. They also support research projects, technical assignments, engineering investigations, and other evidence-based academic work.

    How to Write a Lab Report Step by Step

    1. Understand the Experiment and Its Requirements

    Before writing, make sure you understand what the experiment was designed to investigate.

    Review the lab instructions, research question, relevant scientific concepts, and assessment criteria. Identify what your instructor expects you to measure, compare, calculate, or explain.

    Ask yourself:

    • What question is the experiment intended to answer?
    • Which variables are being investigated?
    • What measurements or observations are required?
    • What format and citation style should I use?
    • Are there specific tables, graphs, or calculations that must be included?

    Keep your original observations and measurements organized from the beginning. Do not rely entirely on memory when writing the report later.

    It is also useful to record unexpected events during the experiment, such as equipment problems, measurement difficulties, or procedural changes. These details may help explain unusual results in the discussion section.

    2. Write a Clear and Specific Title

    The title should tell readers what the experiment investigates without being unnecessarily long.

    Avoid vague titles such as “Chemistry Experiment” or “Lab Report 2.” Instead, describe the main subject or relationship being studied.

    For example:

    Vague title: Plant Experiment

    Improved title: The Effect of Light Intensity on the Growth of Bean Plants

    The improved version identifies the factor being investigated and the outcome being measured.

    A good title is specific, informative, and consistent with the actual experiment. Avoid including conclusions that your results do not establish.

    3. Write the Abstract if Required

    An abstract is a brief summary of the entire experiment. It allows readers to understand the investigation without reading every section first.

    Although it appears near the beginning of a formal report, it is often easier to write the abstract after completing the other sections.

    A typical abstract summarizes:

    • The research question or objective
    • The general method used
    • The most important results
    • The main conclusion

    Keep it concise and include only information supported by the report. Many student abstracts are approximately 100–250 words, but the required length depends on the assignment.

    Example:

    “This experiment investigated how light intensity affected the growth of bean plants over a two-week period. Plants were maintained under different light conditions, and their heights were recorded at regular intervals. The measurements were compared to identify differences in growth between the groups. The results indicated that growth varied across the tested conditions. Further investigation would be needed to determine whether other factors contributed to the observed differences.”

    This is an illustrative example rather than a report of an actual experiment. In your own abstract, replace general statements with your real methods, results, and conclusions.

    4. Write the Introduction and State the Objective

    The introduction explains the scientific background and establishes why the experiment was conducted.

    Begin with the relevant concept or problem. Then explain the scientific principles needed to understand the investigation. Use reliable academic sources when the assignment requires background research.

    A strong introduction usually contains three elements.

    Background information: Explain the relevant scientific concepts, definitions, or theories.

    Research question: State what the experiment is intended to investigate.

    Objective or hypothesis: Describe the aim of the experiment and, where appropriate, your predicted outcome.

    For example, an experiment investigating plant growth might introduce the role of light in photosynthesis before stating that the investigation examines the relationship between light exposure and plant height.

    A hypothesis should be a testable prediction, not simply a statement about what you hope will happen.

    Example hypothesis: “Bean plants receiving more light within the tested range will show greater average growth than plants receiving less light.”

    This prediction would need to be evaluated using the actual experimental data.

    Keep the introduction focused on information relevant to the experiment. Avoid including long explanations that do not help the reader understand the research question.

    5. Describe the Materials and Methods

    The materials and methods section explains how the experiment was performed. Its purpose is to provide enough detail for a reader to understand the procedure and, when appropriate, reproduce it.

    Start by listing the equipment, materials, chemicals, instruments, or software used. Include important quantities, concentrations, specifications, and measurement units when relevant.

    Then describe the procedure in the order it was performed.

    A clear methods section should explain:

    • The equipment and materials used
    • The experimental setup
    • The independent and dependent variables
    • Important controlled variables
    • The measurement procedure
    • The number of trials or observations
    • Any calculations or analytical methods applied

    For example, instead of writing “The plants were watered regularly,” describe the actual watering schedule and volume if these details are relevant and were recorded.

    Use precise language and avoid unsupported statements. If you changed the original procedure during the experiment, explain what changed and why.

    In many formal reports, methods are written in the past tense because they describe completed work. However, follow your instructor’s preferred style.

    Important: Never invent measurements, procedures, equipment, or experimental steps to make a report appear complete. If information is missing, consult your notes or ask your instructor how to handle it.

    6. Present the Results Clearly

    The results section reports what the experiment produced. It should allow readers to see the important observations and numerical findings without having to search through lengthy explanations.

    Depending on the experiment, results may be presented through text, tables, graphs, photographs, or calculated values.

    Use tables when readers need to compare exact measurements. Use graphs when the relationship, distribution, or trend in the data is important.

    For every table or graph:

    • Give it a clear number and descriptive title when required.
    • Label rows, columns, and axes.
    • Include units of measurement.
    • Use an appropriate scale.
    • Report values accurately.
    • Refer to the figure or table in the surrounding text.

    For example, a report might say, “Figure 1 shows how the measured response changed as the temperature increased.”

    That sentence directs the reader to the evidence without repeating every value from the graph.

    Keep the results section focused on observations and calculations. Detailed explanations of why a pattern occurred generally belong in the discussion section.

    How to Present Data in a Table

    A simple table might look like this:

    TrialTemperature (°C)Measured response (units)
    1Recorded valueRecorded value
    2Recorded valueRecorded value
    3Recorded valueRecorded value

    The entries above are placeholders, not experimental findings. Replace them with your actual measurements and use the appropriate variables and units for your investigation.

    If your assignment requires averages, standard deviations, uncertainty estimates, or other statistical measures, calculate them using the appropriate method and explain them where necessary.

    How to Choose an Appropriate Graph

    Choose a graph based on the type of data:

    • Line graph: Useful for showing changes over time or relationships between ordered numerical measurements.
    • Bar chart: Useful for comparing values across distinct categories.
    • Scatter plot: Useful for examining relationships between two numerical variables.
    • Histogram: Useful for showing the distribution of numerical observations.

    Avoid choosing a graph simply because it looks attractive. It should accurately represent the data and make the relevant pattern easier to understand.

    7. Write the Discussion and Interpret Your Findings

    The discussion is often the most analytical part of a lab report. It explains what the results mean and connects the evidence to the research question, hypothesis, and relevant scientific concepts.

    Begin by identifying the most important findings. Explain whether the observed pattern supports the hypothesis, contradicts it, or provides an inconclusive answer.

    Next, compare your findings with established scientific principles or relevant published research when appropriate. If your results differ from an expected outcome, explore possible explanations supported by evidence.

    Consider the following questions:

    • What patterns or relationships appeared in the data?
    • Did the results support the original hypothesis?
    • How do the findings relate to the scientific theory?
    • Were there unexpected observations?
    • What limitations affected the experiment?
    • How could the investigation be improved?

    For example, if repeated measurements vary, possible explanations might include instrument precision, inconsistent experimental conditions, or natural variation in the samples. Discuss only explanations that are plausible for your actual experiment.

    Avoid automatically blaming every unexpected result on “human error.” Identify the specific source of uncertainty or error if you have evidence for it.

    Also distinguish between a genuine experimental limitation and a procedural mistake. A limitation may be an unavoidable restriction of the equipment or study design, while a mistake is an error that occurred during the procedure.

    A strong discussion does not hide inconvenient results. It explains the evidence honestly and acknowledges what the experiment can and cannot establish.

    8. Write a Concise Conclusion

    The conclusion directly answers the research question and summarizes the main finding.

    It should be based on the results presented earlier rather than introducing new data or unrelated information.

    A useful conclusion usually includes:

    1. A brief restatement of the experiment’s objective.
    2. The main result or observed pattern.
    3. An explanation of whether the findings support the hypothesis, if one was proposed.
    4. A short statement about the significance or limitations of the finding when appropriate.

    For example:

    “The experiment examined the relationship between light exposure and plant growth. The recorded measurements showed differences in growth across the tested conditions. These findings provide evidence about the effect of light under the conditions used in the investigation. Further trials with additional controls would help determine how consistently the pattern can be reproduced.”

    This example is illustrative. Your conclusion should reflect the results you actually obtained.

    Avoid introducing new arguments, overstating the significance of a small experiment, or claiming that one observation proves a universal scientific rule.

    9. Add References and Cite Your Sources

    If you used textbooks, journal articles, laboratory manuals, or other sources for scientific background, cite them according to your instructor’s requirements.

    Accurate citations help readers locate the information you used and distinguish published knowledge from your own observations.

    Common citation styles include APA, MLA, and Chicago, although scientific courses may require other formats, such as a discipline-specific numbered style.

    When preparing references:

    • Record the source details while researching.
    • Cite borrowed ideas, facts, and quotations.
    • Ensure every in-text citation has a corresponding reference entry.
    • Follow the required formatting consistently.
    • Verify author names, publication dates, titles, and source details.

    Do not cite a source you have not consulted or invent bibliographic information. If your instructor provides a reference template, use it.

    10. Proofread and Format Your Report

    Before submitting your report, review it for scientific accuracy, organization, grammar, and formatting.

    Check that each section serves its intended purpose and that your discussion and conclusion agree with the data presented in the results section.

    Use this final checklist:

    • Does the title describe the investigation accurately?
    • Is the objective clearly stated?
    • Are the methods detailed enough to understand the procedure?
    • Are measurements and units correct?
    • Are tables and figures clearly labeled?
    • Does the discussion explain the main findings?
    • Is the conclusion supported by evidence?
    • Are sources cited correctly?
    • Have spelling, grammar, and calculation errors been corrected?
    • Have all assignment requirements been followed?

    Pay particular attention to numbers and units. A misplaced decimal point or an incorrect unit can change the meaning of a scientific result.

    If possible, take a short break before proofreading. Reviewing the report with fresh attention can help you notice errors that were easy to miss while writing.

    Lab Report Format: A Simple Example

    The following outline can help you organize a typical formal lab report.

    SectionWhat to include
    TitleThe experiment or relationship being investigated
    AbstractBrief overview of the aim, method, results, and conclusion, if required
    IntroductionScientific background, research question, and hypothesis
    Materials and methodsEquipment, variables, procedure, and analytical methods
    ResultsObservations, measurements, calculations, tables, and graphs
    DiscussionInterpretation, comparison with expectations, and limitations
    ConclusionMain finding and answer to the research question
    ReferencesSources cited in the report
    AppendicesSupplementary data or calculations, if required

    Not every assignment requires all these sections. Short school reports may combine the results and discussion, while advanced university reports may require additional sections for statistical analysis, uncertainty, or experimental design.

    Common Lab Report Mistakes to Avoid

    Even when students understand the experiment, avoidable writing problems can weaken their reports.

    Mixing Results With Discussion

    Reporting measurements and explaining their meaning are different tasks. Present the findings clearly, then interpret them in the discussion unless your instructor requests a combined section.

    Making Unsupported Conclusions

    A conclusion should follow from the evidence. Avoid claiming that a hypothesis is definitively proven when the experiment only provides limited support.

    Leaving Out Measurement Units

    Numerical values are difficult to interpret without units. Label measurements consistently in text, tables, calculations, and graphs.

    Providing an Unclear Procedure

    Descriptions such as “the solution was prepared normally” do not explain what happened. Include the relevant quantities, conditions, and steps.

    Ignoring Unexpected Results

    Unusual findings are still part of the experiment. Report them honestly and consider possible explanations rather than removing observations simply because they do not match your expectations.

    Copying From Online Examples

    Using another student’s report or copying published explanations can lead to plagiarism and may misrepresent your own work. Use sources to understand scientific concepts, cite borrowed ideas, and write your own analysis based on your actual results.

    Writing Too Much Irrelevant Background

    The introduction should prepare the reader to understand the experiment. Remove information that does not contribute to the research question or scientific explanation.

    Tips for Writing a Better University Lab Report

    University laboratory assignments may require more detail and more rigorous analysis than school reports. The following practices can help you meet those expectations.

    Maintain a laboratory notebook. Record observations, measurements, dates, experimental conditions, and procedural changes during the experiment.

    Understand the assessment rubric. Instructors may allocate marks separately for methodology, data analysis, scientific reasoning, presentation, and referencing. Give appropriate attention to each criterion.

    Explain calculations clearly. Show the formula, relevant values, units, and final result when required. Include uncertainty or statistical analysis if specified.

    Use scientific terminology accurately. Define specialized terms when necessary and avoid using technical language you do not understand.

    Distinguish correlation from causation. A relationship between two measured variables does not automatically establish that one caused the other. Consider the design and limitations of the experiment.

    Use feedback to improve. If an instructor identifies weak analysis, unclear figures, or insufficient methodological detail, use those comments to guide your next report.

    Use digital tools carefully. Spreadsheets and graphing software can help organize data and create figures, but verify calculations and ensure that the output represents your measurements accurately.

    Frequently Asked Questions About Writing Lab Reports

    1. What is the correct format for a lab report?

    A typical lab report contains a title, introduction, materials and methods, results, discussion, conclusion, and references. An abstract or appendix may also be required. The exact structure depends on your subject, instructor, and assignment guidelines.

    2. Should a lab report be written in the first person or third person?

    The preferred style depends on the discipline and instructor. Some scientific reports use an impersonal style, while others permit first-person language when it improves clarity. Follow the guidelines provided for your assignment rather than assuming one style is always correct.

    3. What is the difference between the results and discussion sections?

    The results section presents the observations, measurements, calculations, and relevant patterns. The discussion interprets those findings, compares them with expectations or scientific concepts, and considers limitations and possible explanations.

    4. How long should a lab report be?

    There is no universal word count. A short school experiment may require only a few pages, while a detailed university investigation may need a much longer report. Follow the assignment instructions and include enough information to explain the experiment clearly without unnecessary repetition.

    5. Do I need an abstract for every lab report?

    No. Formal reports and some university assignments require an abstract, but short laboratory worksheets may not. Check the report template or marking rubric before adding sections that have not been requested.

    6. How do I write a lab report conclusion?

    Restate the objective briefly, summarize the main finding, and explain what the results indicate about the research question or hypothesis. Keep the conclusion concise and avoid introducing new evidence or making claims that go beyond the data.

    7. Can I use AI tools to help write a lab report?

    AI tools may help explain scientific concepts, improve organization, or identify unclear sentences, but their use must follow your institution’s academic integrity policy. Never use AI to invent results, fabricate sources, or present unverified calculations as correct. Your submitted analysis should accurately reflect your own experiment and permitted assistance.

    Conclusion

    Learning how to write a lab report is an important step toward becoming a more effective science student. A strong report explains the purpose of an experiment, documents the procedure, presents accurate findings, and interprets the evidence using sound scientific reasoning.

    Start by understanding your assignment requirements and organizing your experimental notes. Then write each section with a clear purpose, use tables and graphs where appropriate, and make sure your conclusions are supported by your actual results. Finally, proofread the report for accuracy, clarity, and correct referencing.

    With practice, you can develop a reliable process for producing laboratory reports that are easier to read, scientifically meaningful, and aligned with your instructor’s expectations

  • How to Build a Personal Learning Plan for Professional Development

    How to Build a Personal Learning Plan for Professional Development

    Professional growth rarely happens by accident. Whether you want to earn a promotion, change careers, improve your performance, or prepare for future opportunities, developing the right skills can help you move forward with greater confidence. However, with so many courses, certifications, books, and training opportunities available, knowing what to learn first can be difficult.

    A personal learning plan for professional development helps you turn broad career ambitions into a practical roadmap. It identifies the skills you need, the learning activities that can help you develop them, and the steps you will take to measure your progress.

    Instead of collecting random certificates or trying to learn everything at once, you can focus your time and resources on skills that support your professional goals.

    In this guide, you will learn how to assess your current abilities, set meaningful learning goals, choose suitable resources, create an achievable schedule, and review your progress over time.

    What Is a Personal Learning Plan for Professional Development?

    A personal learning plan for professional development is a structured document that outlines what you want to learn, why it matters to your career, and how you intend to achieve your learning goals.

    It may also be called an individual development plan, professional learning plan, or personal development plan. Although the terminology varies between workplaces and educational institutions, the central purpose is similar: to connect learning activities with specific development needs and future objectives.

    A practical plan usually includes:

    • Career goals: The professional outcomes you want to achieve.
    • Current skills: The knowledge, experience, and abilities you already have.
    • Learning needs: The skills or knowledge you need to strengthen.
    • Learning activities: Courses, projects, mentoring, reading, workshops, or practical experience.
    • Timeline: The time you will dedicate to each activity.
    • Success measures: Evidence that demonstrates what you have learned.
    • Review dates: Opportunities to evaluate progress and adjust your priorities.

    Your plan does not need to be complicated. A one-page document can be effective if it clearly identifies your priorities and next steps.

    Why Is a Personal Learning Plan Important?

    A learning plan gives direction to your professional development. Without one, it is easy to spend time on interesting activities that do not address your most important career needs.

    A structured plan can help you:

    Focus on relevant skills. You can prioritize the abilities most closely connected to your current role or desired career path.

    Use your time more effectively. A realistic schedule makes it easier to balance learning with work, family, and other responsibilities.

    Track progress. Clear milestones help you recognize improvements and identify areas that still need attention.

    Make informed training decisions. You can compare learning resources according to cost, quality, relevance, and practical value.

    Prepare for new opportunities. Developing targeted skills may help you prepare for a promotion, career transition, leadership responsibility, or further education.

    Discuss development with others. A written plan gives you a starting point for conversations with a manager, mentor, coach, or professional adviser.

    A learning plan cannot guarantee a promotion or a new job, but it can help you approach professional growth in a more intentional and measurable way.

    Step 1: Define Your Professional Goals

    Before deciding what to study, identify what you want your learning to help you accomplish.

    Your goal might be to perform better in your current position, qualify for a more senior role, move into a different industry, improve your technical abilities, or prepare for self-employment.

    Try to look beyond general statements such as “I want to improve my skills.” Ask yourself what you want to do differently as a result of learning.

    For example:

    • A marketing assistant may want to become proficient in analytics and campaign reporting.
    • A teacher may want to improve digital teaching and classroom assessment skills.
    • An administrative professional may want to strengthen project coordination and communication.
    • A recent graduate may want to build a portfolio that demonstrates practical industry knowledge.
    • A team leader may want to improve delegation, feedback, and conflict resolution.

    Think about both short-term and long-term goals. A short-term goal might involve learning a software tool over the next eight weeks. A longer-term goal might be preparing for a management position within two years.

    Your learning goals should reflect your interests and values as well as your professional circumstances. You are more likely to sustain your effort when you understand why a goal matters.

    Step 2: Assess Your Current Skills and Knowledge

    Once you have a clear direction, evaluate where you stand today. This helps you identify the difference between your current abilities and the requirements of your desired role or outcome.

    Begin by listing your existing technical skills, communication abilities, professional experience, qualifications, and areas of confidence.

    Next, consider where you need improvement. You can use several sources to make your assessment more accurate:

    • Review the responsibilities and requirements in relevant job descriptions.
    • Examine feedback from performance reviews or previous projects.
    • Ask a trusted colleague, manager, or mentor for constructive feedback.
    • Reflect on tasks you find difficult or regularly need help completing.
    • Compare your current experience with the expectations of your desired role.

    You can also rate your confidence in each skill on a simple scale from 1 to 5. This is not a formal assessment, but it can help you identify areas worth investigating further.

    For example:

    SkillCurrent levelDesired levelDevelopment need
    Spreadsheet analysisIntermediateAdvancedHigh
    Written communicationStrongStrongLow
    Public speakingBeginnerIntermediateHigh
    Project planningIntermediateAdvancedMedium

    The ratings in this example are illustrative. Your own assessment should reflect your experience and the expectations of your field.

    Avoid interpreting every weakness as a problem that needs immediate attention. Focus on gaps that are relevant to your goals, and remember that you may already possess valuable skills developed through work, volunteering, education, or personal projects.

    Step 3: Prioritize the Skills That Matter Most

    After assessing your abilities, you may identify more learning opportunities than you can realistically pursue. Prioritization helps you choose where to begin.

    Consider three factors:

    1. Career relevance: How directly does the skill support your current or desired role?
    2. Importance: Is the skill essential, frequently used, or increasingly expected in your field?
    3. Feasibility: Can you make meaningful progress with the time, budget, and resources available?

    For instance, if you want to move into data analysis, learning a spreadsheet application or a relevant querying language may be more useful initially than studying several unrelated subjects.

    It can help to separate your learning needs into three groups:

    • Immediate priorities: Skills you need for current responsibilities or an upcoming opportunity.
    • Medium-term priorities: Abilities that will help you qualify for future roles.
    • Long-term interests: Subjects you want to explore when time and resources allow.

    Start with one or two major priorities rather than attempting to master everything simultaneously. A narrower focus makes it easier to maintain momentum and measure improvement.

    Step 4: Set SMART Learning Goals

    A useful personal learning plan for professional development should translate broad ambitions into clear actions. One way to do this is to use SMART goals: goals that are Specific, Measurable, Achievable, Relevant, and Time-bound.

    Consider the difference between these two goals:

    Vague goal: Improve my presentation skills.

    SMART goal: Complete a presentation-skills course within eight weeks, deliver two practice presentations to colleagues, and request feedback using a short evaluation checklist.

    The second goal identifies what you will do, how you will measure progress, and when you intend to finish.

    Here is another example:

    • Specific: Learn to analyze business data using spreadsheet tools.
    • Measurable: Complete three practical exercises and produce one dashboard.
    • Achievable: Study for three hours each week.
    • Relevant: The skill supports my goal of qualifying for a reporting role.
    • Time-bound: Complete the learning activities within ten weeks.

    Your measurements should reflect genuine competence rather than simply the number of videos watched or certificates collected. Whenever possible, use a practical task, work sample, assessment, or feedback to demonstrate that you can apply what you have learned.

    Step 5: Choose the Right Learning Activities

    There is no single best way to learn every professional skill. The most suitable activity depends on the subject, your current experience, your preferred learning approach, and the opportunities available to you.

    Consider combining several learning methods.

    Online courses and structured training

    Online courses can provide organized lessons, exercises, and assessments. They may be useful for technical skills, business concepts, communication, and other subjects that benefit from a structured curriculum.

    Before enrolling, check the course syllabus, instructor expertise, assessment methods, cost, and relevance to your goal. Do not assume that every course certificate will be recognized by employers.

    Books, articles, and professional resources

    Books, research articles, industry publications, and official documentation can help you develop a deeper understanding of a subject. Choose credible resources that match your current level and professional needs.

    Practical projects

    Applying knowledge is an essential part of professional learning. You might build a sample dashboard, prepare a project proposal, develop a portfolio, create a training session, or analyze a real workplace problem.

    Practical projects help you identify gaps that may not become obvious when you only read or watch lessons.

    Mentoring and feedback

    A mentor, experienced colleague, or professional coach can offer guidance, suggest resources, and help you evaluate your progress. Regular feedback is particularly useful for skills such as leadership, communication, decision-making, and collaboration.

    Workshops and professional communities

    Workshops, webinars, industry events, and professional associations can introduce you to new practices and help you learn from other people in your field.

    Choose activities that directly support your learning goals. A few well-selected resources combined with consistent practice are often more manageable than enrolling in multiple courses at the same time.

    Step 6: Create a Realistic Learning Schedule

    Even a well-designed plan can fail if it does not fit your daily routine. Decide when you will learn and how much time you can realistically protect each week.

    For example, a working professional might set aside three 45-minute sessions during the week and one longer session on the weekend. Another person might prefer a single weekly workshop followed by practical exercises.

    Your schedule should include:

    • The learning activity you intend to complete.
    • The time you will allocate to it.
    • A target completion date.
    • A practical task or milestone.
    • A date to review your progress.

    Here is an illustrative eight-week schedule:

    PeriodLearning activityExpected outcome
    Week 1Assess current skills and select resourcesA clear learning objective
    Weeks 2–3Complete introductory lessonsUnderstanding of core concepts
    Weeks 4–5Practice through guided exercisesImproved practical ability
    Weeks 6–7Complete an independent projectEvidence of skill application
    Week 8Review results and seek feedbackA record of progress and next steps

    Adjust this schedule according to the complexity of the skill and your existing knowledge. Some goals may take months or years, while others can be completed in a few weeks.

    Leave room for unexpected responsibilities. A flexible plan that you can maintain is more useful than an ambitious schedule that quickly becomes unrealistic.

    Step 7: Track Your Progress and Measure Results

    Tracking progress helps you determine whether your learning activities are producing useful results.

    At the start of your plan, decide what evidence will demonstrate improvement. Depending on your goal, this might include a completed project, a successful assessment, constructive feedback, increased responsibility at work, or the ability to perform a task independently.

    For example, if your goal is to improve written communication, you could compare an early work sample with a later one using the same criteria. If you want to improve project management, you might plan and deliver a small project, then evaluate its timeline, communication, and outcome.

    Keep a simple learning record with the following information:

    • What you worked on.
    • What you learned.
    • Which activities you completed.
    • What you can now do independently.
    • What remains difficult.
    • What you plan to do next.

    This record can also help when updating your résumé, preparing for performance reviews, or discussing development opportunities with your manager.

    Remember that progress is not always linear. A challenging assignment or unsuccessful attempt can reveal exactly what you need to practice next.

    Step 8: Review and Update Your Learning Plan

    Professional goals can change as you gain experience, discover new interests, or encounter different opportunities. Your learning plan should therefore be reviewed regularly rather than treated as a permanent document.

    A monthly review may be appropriate for a short-term goal, while a longer professional development plan might benefit from a quarterly review.

    During each review, ask yourself:

    • Have I completed the activities I planned?
    • Can I demonstrate the skill more effectively than before?
    • Which learning methods were most useful?
    • Did any unexpected responsibilities affect my schedule?
    • Do my goals still match my career direction?
    • What should I continue, change, or stop doing?

    If a course is not meeting your needs, consider changing resources. If your goal turns out to be too broad, break it into smaller milestones. If you have achieved the intended outcome, identify the next skill that would be most valuable.

    A learning plan is a tool for making decisions, not a test of personal discipline. Updating it when circumstances change is part of using it effectively.

    Personal Learning Plan for Professional Development: Example Template

    Use the following template to create your own plan. You can copy it into a document or spreadsheet and update it as your goals develop.

    Planning areaYour details
    Career goalWhat professional outcome do I want to achieve?
    Priority skillWhat skill or knowledge will help me reach it?
    Current abilityWhat can I do confidently today?
    Development gapWhat do I need to improve?
    Learning activitiesWhich courses, projects, readings, or mentoring opportunities will I use?
    Weekly commitmentHow much time can I realistically allocate?
    Target dateWhen do I intend to complete the goal?
    Success measureWhat evidence will demonstrate progress?
    Support neededDo I need a mentor, budget, software, or manager approval?
    Review dateWhen will I evaluate and update the plan?

    Example of a completed plan

    Imagine that a marketing professional wants to improve their ability to analyze campaign performance.

    • Career goal: Become more confident in making data-informed marketing decisions.
    • Priority skill: Campaign analytics and reporting.
    • Current ability: Can interpret basic campaign metrics but struggles to create clear reports.
    • Learning activities: Complete an analytics course, practice with sample data, and build a monthly campaign dashboard.
    • Weekly commitment: Three hours.
    • Target date: Ten weeks from the start date.
    • Success measure: Produce a dashboard, explain key performance indicators, and obtain feedback from a colleague.
    • Support needed: Access to suitable practice data and guidance from an experienced analyst.
    • Review date: Every two weeks.

    This example demonstrates how a broad ambition can become a specific, manageable plan. Adapt the details to your own role, resources, and professional goals.

    Common Mistakes to Avoid

    A personal learning plan is most effective when it remains practical and relevant. Avoid these common mistakes:

    Setting too many goals at once. Trying to develop multiple complex skills simultaneously can divide your attention. Start with the highest-priority needs.

    Choosing courses without a clear purpose. A popular course is not necessarily the right course for your goals. Define the outcome before selecting the resource.

    Ignoring practical application. Completing lessons is not the same as being able to use a skill. Include exercises, projects, or workplace applications.

    Creating an unrealistic schedule. Account for your workload and other responsibilities. Consistency matters more than an unsustainable burst of effort.

    Measuring activity instead of ability. The number of hours studied is useful, but evidence of improved performance is more meaningful.

    Never reviewing the plan. Regular reviews help you adapt to changing goals and make better use of your time.

    Final Thoughts

    Building a personal learning plan for professional development is a practical way to take control of your career growth. By defining your goals, assessing your current skills, prioritizing learning needs, and setting measurable milestones, you can make professional learning more focused and manageable.

    You do not need an elaborate document or a long list of courses to get started. Choose one meaningful goal, identify the most important skill to develop, and plan the first few learning activities. Set aside time to practice, collect evidence of progress, and review your results regularly.

    The most effective learning plan is one you can use consistently. As your experience and ambitions change, update your priorities and keep building the knowledge and abilities that support your next professional step.

    Frequently Asked Questions

    What should a personal learning plan for professional development include?

    It should include your career goals, current skills, development needs, learning activities, schedule, resources, success measures, and review dates. The plan should be specific enough to guide your next actions but flexible enough to adapt as your circumstances change.

    How often should I update my professional learning plan?

    Review your progress monthly or quarterly, depending on the length and complexity of your goals. Update the plan when your responsibilities, career interests, or learning needs change.

    What is the difference between a learning plan and a professional development plan?

    The terms often overlap. A learning plan typically emphasizes the knowledge and skills you want to acquire and how you will learn them. A professional development plan may cover a broader range of career activities, including mentoring, networking, work experience, and preparation for future roles.

    Do I need to take courses to develop professionally?

    No. Courses can be useful, but professional development can also involve practical projects, mentoring, feedback, reading, job shadowing, workshops, and new responsibilities. Choose activities that help you meet your specific learning objectives.

    How can I measure professional learning progress?

    Use evidence that shows what you can do, such as completed projects, assessment results, work samples, feedback, or improved performance. Combine these measures with regular reflection to identify what you have learned and what needs further practice.

    Can I create a professional learning plan without a manager?

    Yes. You can develop your own plan by assessing your skills, researching your target role, and identifying relevant learning resources. If appropriate, you can later discuss the plan with a manager, mentor, or experienced colleague to obtain feedback and support.

  • Microcredentials vs Traditional Degrees: What Students Should Know

    Microcredentials vs Traditional Degrees: What Students Should Know

    Choosing the right educational pathway is an important decision for students, recent graduates, and working professionals. While traditional university degrees remain a popular route to higher education and career development, microcredentials have emerged as a flexible way to learn specific skills, update professional knowledge, and explore new fields.

    Understanding microcredentials vs traditional degrees can help you decide which option best fits your career goals, budget, schedule, and previous education. Microcredentials may offer targeted training in areas such as data analysis, digital marketing, project management, and cybersecurity. Traditional degrees generally provide broader academic knowledge, structured learning, and qualifications that may be required for certain professions or further study.

    Neither option is automatically better for everyone. The right choice depends on what you want to learn, how employers or universities recognize the qualification, and what you plan to do next.

    What Are Microcredentials?

    Microcredentials are short, focused learning achievements that demonstrate knowledge or skills in a specific area. They may be awarded after completing an online course, a professional training program, a university short course, or an assessed learning experience.

    Unlike a full degree, a microcredential usually concentrates on a narrower subject rather than covering a broad academic discipline. For example, a learner might earn a microcredential in data visualization, digital project management, cloud computing, or academic research methods.

    Microcredentials may take a few hours, several weeks, or a few months to complete, depending on the provider, subject, and assessment requirements. Some include practical assignments, examinations, or projects, while others use different forms of assessment.

    Common examples include:

    • A certificate demonstrating proficiency in a particular software tool.
    • A short course in data analytics or artificial intelligence.
    • Professional training in leadership or project management.
    • A university-issued credential in a specialized subject.
    • A digital badge that verifies an assessed learning achievement.

    However, not every online certificate qualifies as a high-quality microcredential. The value of a credential depends on its learning outcomes, assessment standards, issuing organization, and recognition by relevant employers or educational institutions.

    UNESCO describes microcredentials as records of focused learning achievements that verify what a learner knows, understands, or can do. They may have independent value or contribute to a larger qualification when an institution recognizes them. This means learners should check the credential’s specific status rather than assuming that every certificate carries the same weight.

    What Are Traditional Degrees?

    Traditional degrees are formal academic qualifications awarded by recognized higher education institutions after students complete an approved program of study.

    Examples include bachelor’s degrees, master’s degrees, and doctoral degrees. Depending on the country and institution, undergraduate degrees often require several years of study, while postgraduate programs vary in length according to their academic requirements and research components.

    Degree programs generally combine multiple subjects, assessments, and learning experiences. Depending on the field, students may complete lectures, seminars, laboratory work, internships, research projects, examinations, or a dissertation.

    Traditional degrees can provide several benefits:

    • Broad knowledge of an academic discipline.
    • A structured curriculum with progressive learning outcomes.
    • Opportunities to develop critical thinking and research skills.
    • Access to academic support, facilities, and professional networks.
    • A formal qualification that may be required for employment or further education.

    Some careers require a recognized degree, professional license, or additional accredited training. For example, meeting the educational requirements for certain regulated professions cannot necessarily be achieved through a collection of short online certificates.

    Students should therefore examine the formal entry requirements for their intended career or postgraduate program before deciding whether a degree is necessary.

    Microcredentials vs Traditional Degrees: Key Differences

    Although both options support learning, they differ in scope, duration, cost, flexibility, and recognition.

    FeatureMicrocredentialsTraditional degrees
    Learning scopeFocused on specific skills or competenciesCovers a broader academic discipline
    DurationOften hours, weeks, or monthsUsually several years, depending on the program
    CostOften lower total cost, but varies by providerUsually a larger overall financial commitment
    FlexibilityFrequently available online or part-timeMay involve scheduled classes and longer-term commitments
    AssessmentMay include practical tasks, tests, or projectsUsually includes multiple assessments across the program
    RecognitionDepends on the provider, assessment, and industryDepends on institutional recognition, accreditation, and the qualification
    Career purposeTargeted upskilling or reskillingBroad education and preparation for careers or further study
    Further educationCredit transfer is possible only where acceptedOften provides an established route to postgraduate study

    These differences are general patterns rather than universal rules. Some microcredentials are rigorous and university-issued, while some degree programs offer flexible online study. Always compare the actual program requirements and recognition arrangements.

    1. Duration and Learning Flexibility

    One of the most noticeable differences between microcredentials and traditional degrees is the time required to complete them.

    Microcredentials are often designed for learners who need to acquire a specific skill without committing to a lengthy program. A working professional might complete a short course in spreadsheet analysis over several weekends or study a new digital tool in the evenings.

    This flexibility can make microcredentials useful for people who have employment, family responsibilities, or limited time for formal education.

    Traditional degrees usually require a longer commitment. Students work through a planned curriculum and complete multiple modules or courses before earning the qualification. This extended structure can help them develop a deeper understanding of a subject and connect ideas across different areas.

    Which is better? If you need a particular skill quickly, a microcredential may be suitable. If you want comprehensive subject knowledge or need a formal degree for your career, a traditional program may be the better choice.

    2. Cost and Financial Commitment

    Microcredentials can cost less than a full degree because they typically involve a smaller amount of learning. They may also reduce indirect expenses by allowing learners to study online while continuing to work.

    However, the price varies considerably. A short course from a major university or professional organization may be expensive, and completing several microcredentials can add up over time.

    Traditional degrees often involve higher total tuition and related costs, including learning materials, accommodation, transportation, and living expenses. Scholarships, grants, assistantships, and part-time study options may reduce the financial burden.

    When comparing costs, look beyond the advertised course fee. Consider the total expense, the time required, potential lost earnings, and whether the qualification will help you achieve your intended goal.

    A lower-cost credential is not necessarily better value if employers do not recognize it. Similarly, a degree may be a worthwhile investment when it is necessary for a profession or provides a strong foundation for long-term career development.

    3. Career Opportunities and Employer Recognition

    Career outcomes are a major consideration when comparing microcredentials vs traditional degrees.

    Microcredentials can help demonstrate specific abilities to employers. For example, someone working in marketing might complete a course in search engine optimization, while a business analyst might learn a new data visualization tool.

    They can also help experienced workers update their skills as technologies and job requirements change. A relevant, assessed credential may strengthen a résumé when combined with practical experience and demonstrable results.

    Traditional degrees can provide broader preparation for entry-level roles, professional advancement, or careers where employers require a particular academic qualification. A degree may also be important when applying for government positions, graduate training schemes, or postgraduate programs.

    However, neither type of credential guarantees employment or a higher salary. Employers may consider experience, technical ability, portfolios, communication, and other qualifications alongside formal education.

    Before enrolling, review job advertisements in your target field. Look for required degrees, preferred certifications, specific technical skills, and professional licensing requirements. This gives you a practical basis for deciding which learning pathway is most relevant.

    4. Academic Recognition and Further Study

    Recognition is one of the most important factors to investigate before paying for a microcredential.

    Some universities allow selected microcredentials to count toward academic credit, professional development, or a larger qualification. Others offer certificates that are valuable for learning but do not provide transferable university credits.

    Credit transfer is never automatic. It may depend on the institution, course content, assessment level, number of learning hours, grades, and the receiving program’s rules.

    Traditional degrees generally follow more established qualification frameworks, but recognition still varies by institution, country, accreditation status, and intended use.

    If you want to pursue a master’s degree or doctorate later, contact the relevant admissions office before relying on microcredentials to meet entry requirements. Ask whether the credential is recognized, whether it provides academic credit, and whether it satisfies any specific prerequisites.

    Students in Pakistan can also check the Higher Education Commission’s Pakistan Qualification Register when evaluating relevant higher education qualifications and recognized providers. International students should consult the official recognition and accreditation authorities in the country where they plan to study or work.

    5. Learning Experience and Skill Development

    Microcredentials and traditional degrees often offer different learning experiences.

    Microcredentials usually focus on a defined outcome. A course might teach learners how to create a dashboard, use a software application, manage a project, or apply a particular research method. This targeted approach can be helpful when a learner already has foundational knowledge and wants to address a specific skills gap.

    Traditional degree programs generally provide a wider learning experience. Students may explore theory, complete group assignments, undertake research, and develop communication and analytical skills over time. Campus-based programs may also offer laboratories, libraries, academic advising, clubs, and opportunities to collaborate with classmates.

    Online degree programs can provide many of these benefits remotely, although the exact experience varies.

    Neither format guarantees high-quality learning. Before enrolling, check the curriculum, teaching methods, instructor qualifications, assessment process, student support, and opportunities to apply what you learn.

    6. Advantages and Disadvantages of Microcredentials

    Microcredentials offer flexibility, but students should understand their limitations.

    Advantages of microcredentials

    • Focused learning: Concentrate on one skill or subject without studying unrelated modules.
    • Flexible schedules: Many courses allow learners to study alongside employment or other commitments.
    • Targeted professional development: Learn a skill that relates directly to a current role or career transition.
    • Smaller initial commitment: Test interest in a field before pursuing a longer qualification.
    • Potentially lower cost: Some credentials cost less than enrolling in a full degree program.

    Disadvantages of microcredentials

    • Uneven recognition: Employers and universities do not value every credential equally.
    • Limited academic breadth: A short course may not provide the theoretical foundation of a full degree.
    • Variable quality: Providers differ in teaching standards, assessment, and credibility.
    • Uncertain credit transfer: A credential may not count toward a degree or professional qualification.
    • Accumulating costs: Multiple courses may become expensive without leading to a recognized qualification.

    Microcredentials are most useful when the learning outcomes are clear, the provider is credible, and the credential addresses a genuine educational or professional need.

    7. Advantages and Disadvantages of Traditional Degrees

    Traditional degrees offer structured, comprehensive education, but they also require a significant commitment.

    Advantages of traditional degrees

    • Broad academic foundation: Study a discipline in greater depth and explore related subjects.
    • Established qualification pathways: Meet degree requirements for many professional and postgraduate routes.
    • Structured progression: Follow a curriculum with planned assessments and academic milestones.
    • Research and practical experience: Access projects, laboratories, internships, or supervised research where available.
    • Long-term development: Build transferable skills and academic networks over an extended period.

    Disadvantages of traditional degrees

    • Longer completion time: Students may need several years to graduate.
    • Higher total costs: Tuition and living expenses can create a substantial financial burden.
    • Less immediate specialization: Some programs may not cover a particular emerging skill in sufficient detail.
    • Scheduling commitments: Certain programs require attendance, placements, or fixed class times.
    • No guaranteed outcome: A degree alone does not ensure employment, promotion, or a particular salary.

    The value of a traditional degree depends on its quality, relevance, cost, and fit with your plans. Researching graduate outcomes and course content can help you make a more informed choice.

    8. Can You Combine Microcredentials and a Traditional Degree?

    Yes. For many learners, combining the two approaches can be more practical than choosing only one.

    A student might complete a bachelor’s degree in business and earn a microcredential in data analytics to develop a specific technical skill. A computer science graduate might take a short course in cloud computing to complement their existing knowledge. A teacher could pursue professional development in digital learning tools alongside a formal teaching qualification.

    This approach combines broader academic preparation with targeted skills development.

    However, do not assume that collecting multiple certificates is equivalent to completing a degree. The credentials should support a coherent goal and provide evidence of relevant learning.

    Before investing in a microcredential, consider whether it fills a genuine skills gap, is recognized by the people who matter for your goal, and offers practical value beyond what you already know.

    How to Choose Between Microcredentials and Traditional Degrees

    Use these questions to evaluate your options:

    1. What is my primary goal? Decide whether you want to qualify for a profession, enter postgraduate study, change careers, or learn one specific skill.
    2. What do employers or universities require? Check formal degree requirements, professional regulations, and accepted credentials.
    3. How much time can I commit? Consider your work, family, financial, and academic responsibilities.
    4. What is my total budget? Include tuition, additional fees, materials, and indirect costs.
    5. Is the provider credible? Investigate recognition, assessment standards, instructor expertise, and course outcomes.
    6. Can the learning be applied? Look for projects, practical assessments, or opportunities to demonstrate your skills.
    7. Will the qualification support my next step? Confirm whether it helps you meet a specific career or educational requirement.

    For a useful comparison, shortlist two or three programs and evaluate their content, costs, completion requirements, and recognition. Avoid choosing solely because a course is inexpensive or a university has a strong reputation.

    Final Thoughts

    The comparison of microcredentials vs traditional degrees is not simply a choice between modern learning and traditional education. Both can play valuable roles in personal and professional development.

    Microcredentials are often a practical option for focused skill development, flexible learning, and professional upskilling. Traditional degrees may be more appropriate when you need comprehensive academic preparation, a recognized qualification for a regulated profession, or a formal pathway to further study.

    The best decision begins with your goal. Research the requirements of your intended career, verify the provider’s credibility, compare the total costs, and confirm whether the qualification will be recognized where you intend to use it.

    For some learners, a degree will be the essential foundation. For others, a microcredential may address an immediate skills gap. For many, combining formal education with targeted short courses can provide a balanced approach to lifelong learning.

    Frequently Asked Questions

    Are microcredentials as valuable as traditional degrees?

    Their value depends on the purpose. Microcredentials can demonstrate specific, assessed skills, while traditional degrees generally provide broader academic study and may meet formal qualification requirements. Employers and institutions differ in how they recognize each type.

    Can microcredentials help me get a job?

    Yes, they may strengthen your application when they teach relevant skills and come from a credible provider. Their impact depends on the job, employer expectations, assessment quality, and your overall experience. They do not guarantee employment.

    Can microcredentials replace a bachelor’s degree?

    Not in every situation. Some employers accept relevant skills and experience instead of a degree for certain positions, but other roles require a formal qualification. Regulated professions and postgraduate admissions may have specific degree requirements.

    Are microcredentials cheaper than university degrees?

    Many individual microcredentials cost less than a full degree, but prices vary. If you need several courses, the combined cost can increase. Compare total expenses and the practical value of the learning before enrolling.

    Can microcredentials count toward a university degree?

    Some institutions accept selected microcredentials for academic credit or recognition of prior learning. Others do not. Contact the receiving institution and obtain confirmation before assuming that credits will transfer.

    What should I check before enrolling in a microcredential?

    Review the provider’s reputation, learning outcomes, instructor qualifications, assessment requirements, total cost, and recognition by employers or universities. Confirm whether the credential is assessed and whether it offers academic credit if that matters to your plans.

  • Agricultural Science and Food Technology Education in Poland

    Introduction

    Poland offers a varied setting for students interested in agricultural education. Its higher education landscape includes institutions with different academic profiles, allowing learners to compare theoretical study with practical preparation. The field brings together soil science, crop production, and food chemistry, but success also depends on curiosity, steady effort, and the ability to ask informed questions. A useful starting point is to understand how a course is organized, what its learning outcomes mean, and how students can build experience beyond lectures. This article explores the academic journey, the learning environment, and possible next steps for students considering this area in Poland.

    Choosing a Suitable Programme

    Choosing a programme requires more than reading a university ranking or selecting an attractive city. Prospective students should examine course descriptions, language of instruction, admission criteria, and the balance between required and elective modules. In agricultural education, attention to soil science, crop production, and food chemistry can reveal whether a degree matches personal interests. Students should also check the institution’s official website for current requirements, because programme details and application dates can change. Comparing several options, reviewing the curriculum semester by semester, and contacting an admissions office can prevent misunderstandings before an application is submitted.

    Academic Foundations

    The early stages of agricultural education usually emphasize foundations that support more advanced work. Students encounter ideas connected with soil science, crop production, and food chemistry and learn to apply them systematically rather than memorizing isolated facts. Tutorials, readings, and regular assignments can reinforce lecture material. Effective study habits include keeping clear notes, reviewing difficult concepts promptly, and discussing problems with classmates. A strong foundation matters because later modules often assume that students can connect several earlier topics. It also makes it easier to recognize where an individual’s strengths and interests lie.

    Learning Through Practice

    Practical learning gives academic concepts a clearer purpose. Depending on the programme, students may experience farm visits and food quality testing and receive feedback from instructors or project supervisors. These activities encourage them to plan their work, record results carefully, and explain the reasons behind decisions. Mistakes can become useful learning opportunities when they are reviewed openly and corrected methodically. Students should look for courses that explain how practical work is assessed and what equipment or resources are available. A portfolio of completed assignments can later demonstrate progress more effectively than a list of course titles alone.

    Campus Resources and Student Support

    An effective learning environment extends beyond the classroom. In Poland, students can explore agricultural universities and food science laboratories, as well as libraries, consultation hours, and student societies where available. Academic advisers may help with module choices, while international offices can clarify administrative procedures for students arriving from abroad. Support services vary by institution, so applicants should verify what a particular university provides. Joining a study group, attending a faculty event, or speaking with senior students can make an unfamiliar academic system easier to navigate. Taking advantage of resources early often helps students build confidence and independence.

    Developing Transferable Skills

    Technical knowledge is only one part of academic preparation. Students working in agricultural education also benefit from food safety and responsible land management. Group assignments offer opportunities to divide responsibilities, communicate progress, and resolve disagreements respectfully. Written reports and presentations help learners explain complicated ideas to people who may not share their background. Managing deadlines across several modules teaches realistic planning. These abilities matter in further study and employment because complex projects rarely depend on one person or one type of expertise. Students can improve them deliberately by requesting feedback and reflecting on completed work.

    Research and Independent Projects

    Research creates opportunities to investigate questions that do not have a single ready-made answer. In agricultural education, projects related to precision farming and sustainable food research can introduce students to literature reviews, research methods, and careful interpretation of findings. A supervisor can help narrow a broad interest into a manageable question. Students should distinguish reliable evidence from unsupported claims and document sources consistently. Not every degree requires extensive research, yet even a small independent project can strengthen analytical habits. Presenting results at a student seminar or preparing a final thesis may also clarify whether postgraduate study is an appealing direction.

    Preparing for Future Opportunities

    Career planning is most useful when it begins before graduation. Possible directions associated with this subject include agritech, food production, and quality assurance, although actual opportunities depend on qualifications, experience, language ability, and labour-market conditions. Internships, university career events, and carefully chosen projects can help students test their interests. A clear CV should describe responsibilities and measurable contributions without exaggeration. Students considering regulated professions must check the applicable licensing and recognition rules separately. Building relationships with instructors and classmates can provide valuable guidance, but each student should make decisions based on verified requirements and personal goals.

    Conclusion

    Studying agricultural education in Poland can combine structured academic learning with practical experience and broader personal development. The most useful approach is to compare programmes carefully, strengthen fundamentals, seek constructive feedback, and remain open to new areas of interest. Students who use available resources and document their progress can make better-informed choices about research, employment, or further education. Rather than relying on general promises about a degree, applicants should check the details of each institution and build a study plan that fits their circumstances. Consistent effort and thoughtful exploration remain central to a rewarding educational experience.